Bitcoin speichern auf dem Ledger Nano S Plus (2025)
Inhaltsverzeichnis
Wie speichere ich Bitcoin?
Nachdem der Kauf von Bitcoins und anderen Kryptowährungen abgeschlossen ist, sind diese auf dem Online Wallet dieses Anbieters gespeichert.
Mit der Nutzung eines Online Wallets ist aber ein großes Risiko verbunden - bei einer Schließung der Plattform oder einer Hackerattacke können alle Bitcoins sowie andere Kryptowährungen für immer verloren sein. Aus diesem Grund solltest du deine Kryptowährungen auf Offline Hardware Wallets (Cold Wallets) speichern, da sie dort keinem äußerem Einfluss ausgesetzt sind.
Am sichersten ist die Speicherung von Kryptowährungen also in Offline Hardware Wallets. Die beiden meistverkauften Hardware Wallets sind der Ledger Nano S Plus und der Ledger Nano X.
HINWEIS - Kaufe nie ein gebrauchtes Wallet, da du selbst eine PIN und Sicherheitswörter vergeben musst.
Gebrauchte Wallets sind nicht sicher!
Diese Seite ist eine Informationsseite. Der Autor dieser Seiten ist bemüht, den Stand der Dokumentation auf dem neuesten Stand zu halten. Durch laufende Softwareupdates der Plattformanbieter und Gerätehersteller kann die Aktualität aber nicht garantiert werden.
Es wird daher keine Haftung für Fehler oder Verluste jeglicher Art übernommen. Die Nutzung dieser Informationen geschieht auf eigene Gefahr.
Wallet direkt & sicher nur vom Hersteller kaufen
Um maximale Sicherheit für deine Kryptoassets zu gewährleisten, solltest du nur komplett unbenutzte Wallets benutzen. Aus diesem Grund solltest du Wallets nur direkt beim Hersteller kaufen, da nur so sichergestellt ist, dass niemand anderer das Wallet vor dir benutzt hat.
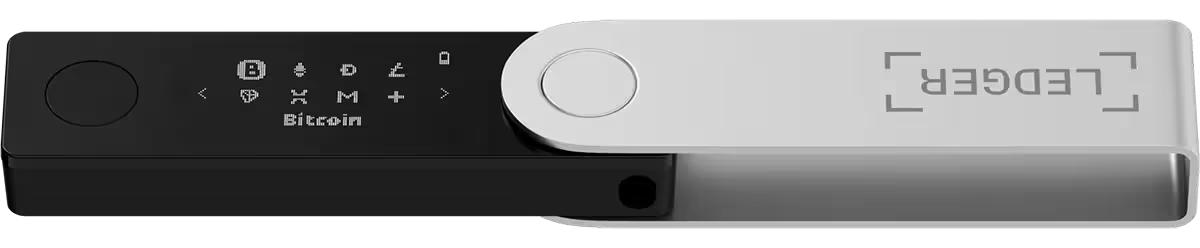
Ledger Nano S Plus
- Bis zu 100 Apps für 5,500 kompatible Krypto-Assets installierbar
- Mit 50+ Wallets kompatibel
- Speicherplatz: 1.5 MB
- Zertifiziertes Sicherheitselement (CC EAL5+)
- Unabhängig zertifiziert von ANSSI
- 24-Wort Wiederherstellungsphrase
- 8 Stunden Standby-Mode
- 1,09" Schwarzweiß OLED-Display
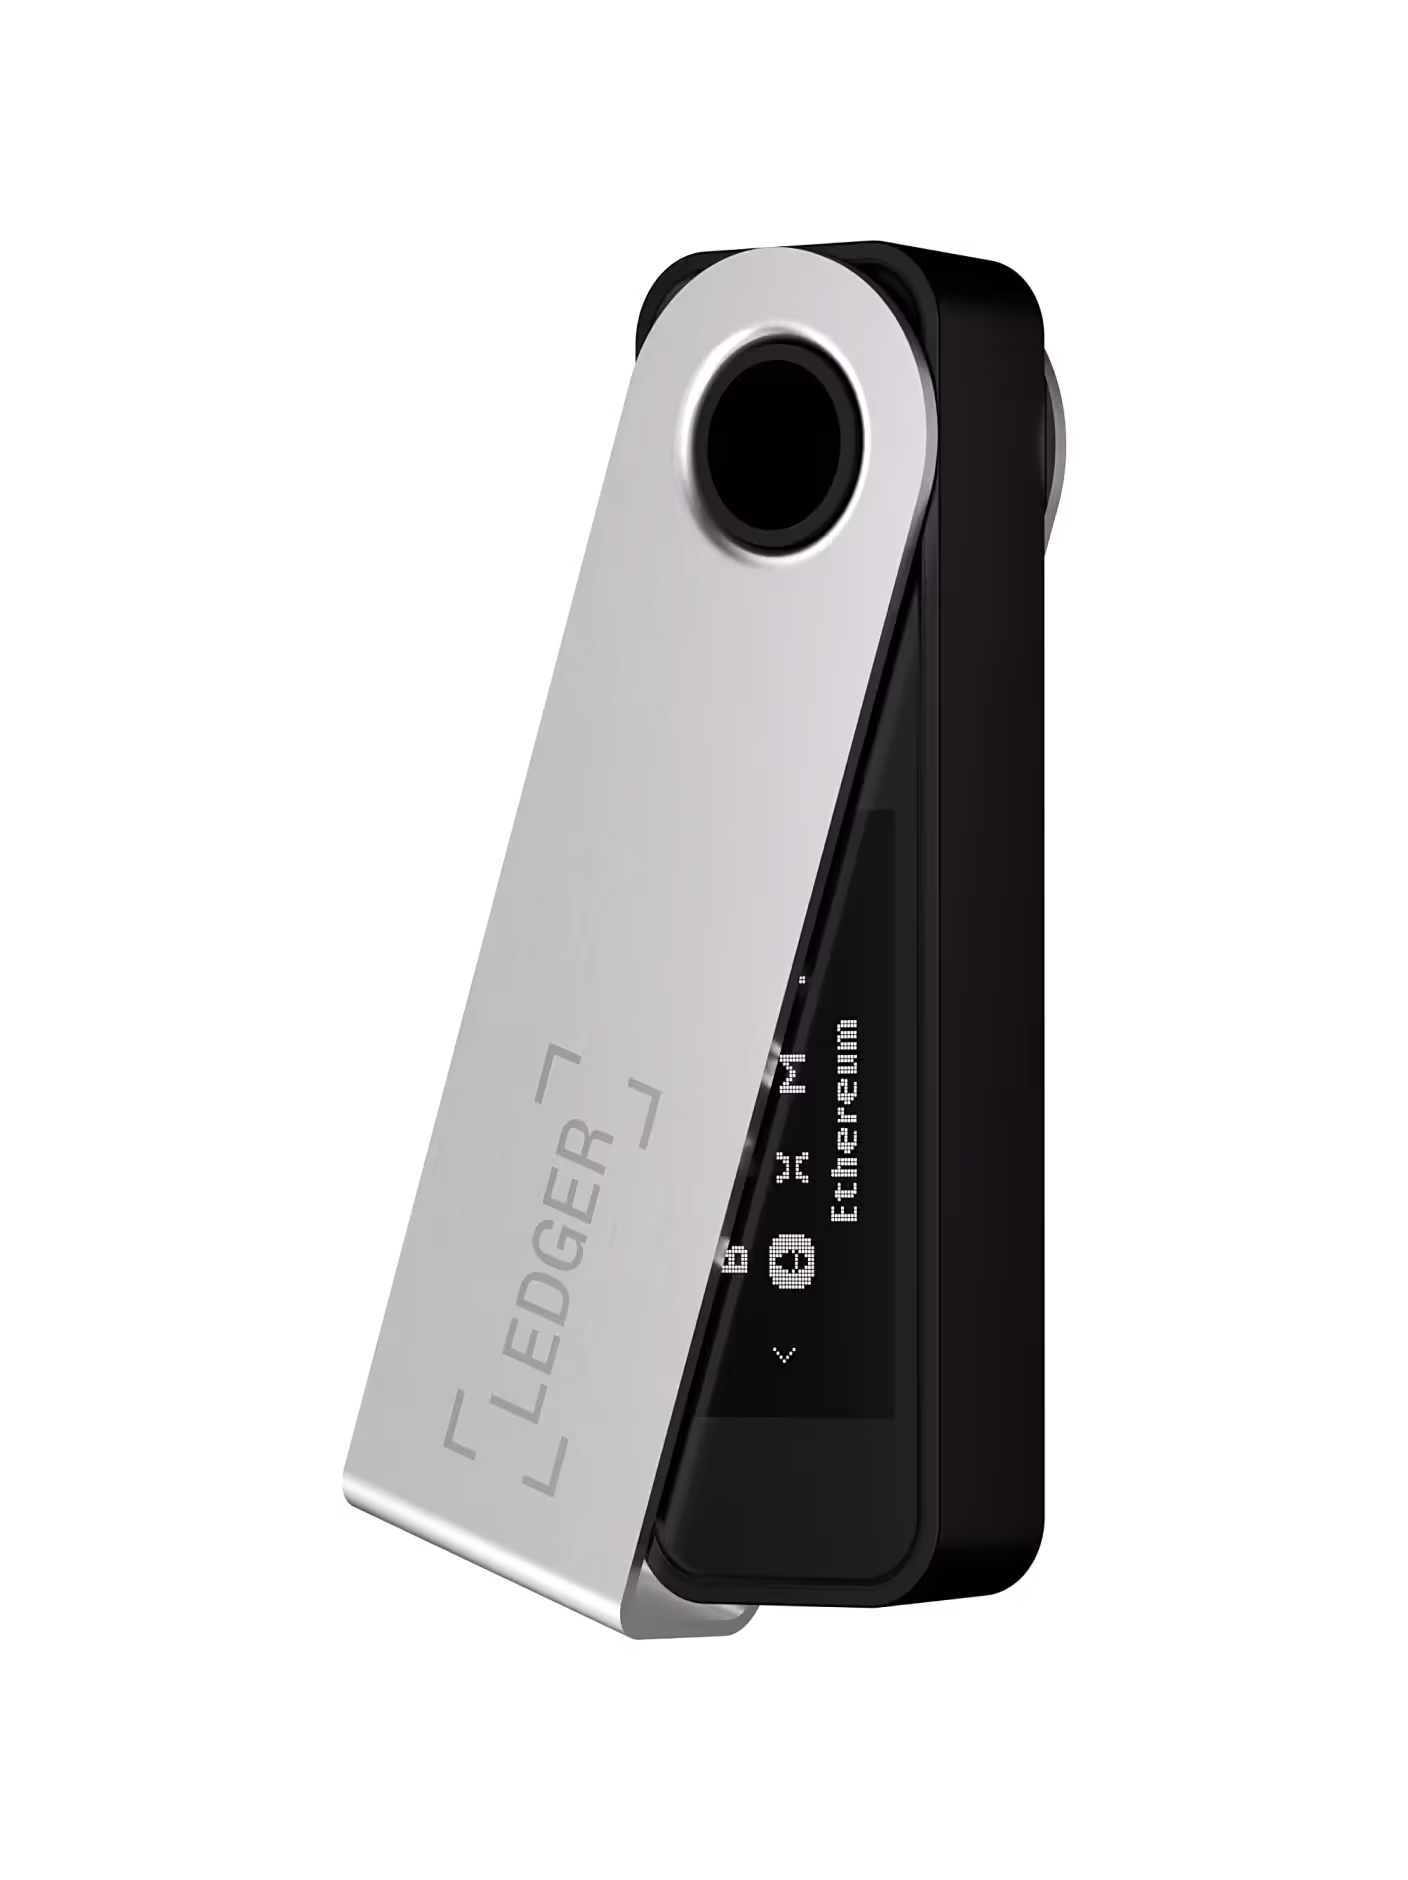
Ledger Nano X

- Bis zu 100 Apps für 5,500 kompatible Krypto-Assets installierbar
- Mit 50+ Wallets kompatibel
- Speicherplatz: 2.0 MB
- Zertifiziertes Sicherheitselement (CC EAL5+)
- Unabhängig zertifiziert von ANSSI
- 24-Wort Wiederherstellungsphrase
- Bluetooth® kompatibel mit Ledger Live Mobile
- 8 Stunden Standby-Mode
- 1,09" Schwarzweiß OLED-Display
Ledger Flex
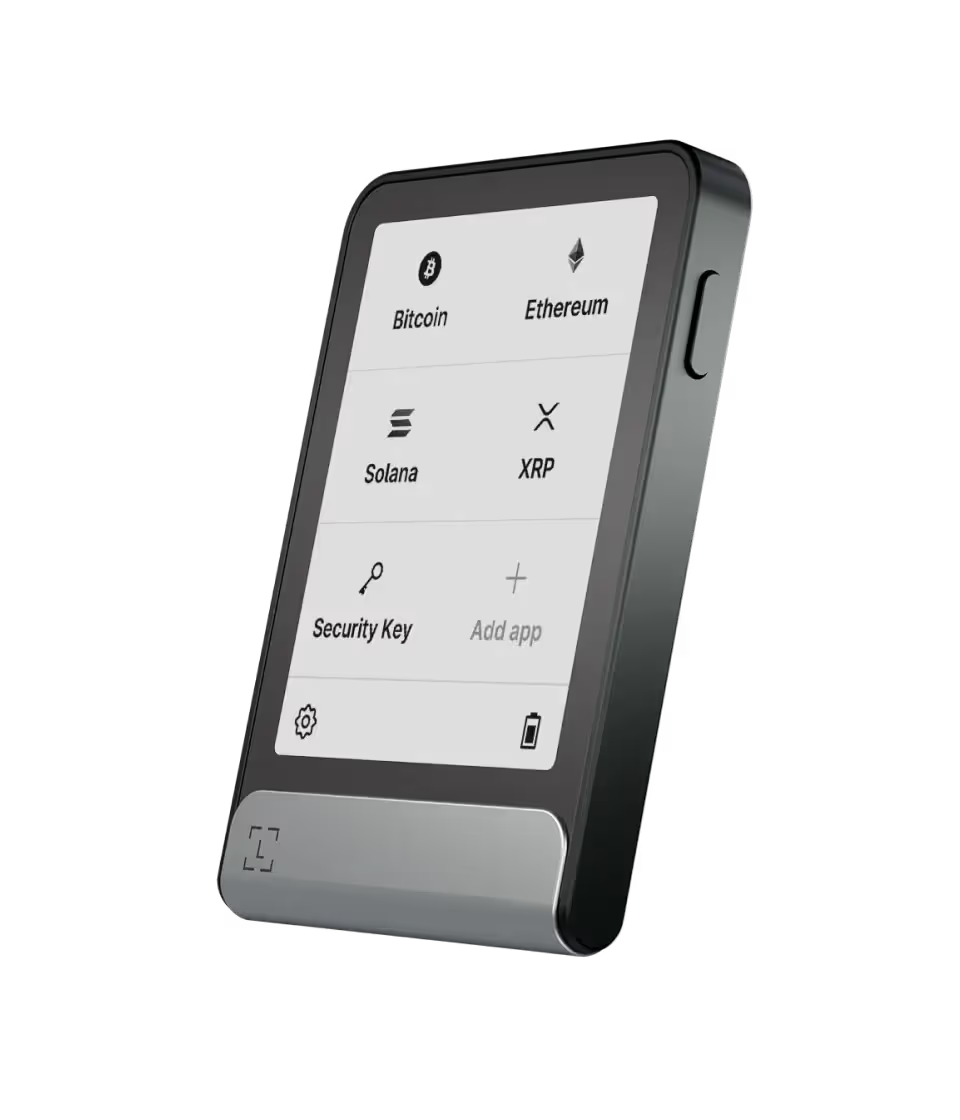
- Bis zu 100 Apps für 5,500 kompatible Krypto-Assets installierbar
- Mit 50+ Wallets kompatibel
- Zertifiziertes Secure Element (CC EAL6+)
- 24-Wort Wiederherstellungsphrase
- Bluetooth® kompatibel mit Ledger Live Mobile
- 10 Stunden Standby-Mode
- E-Ink Touch-Display mit 2.84" Größe
- Einstellbarer Lockscreen
Ledger Stax
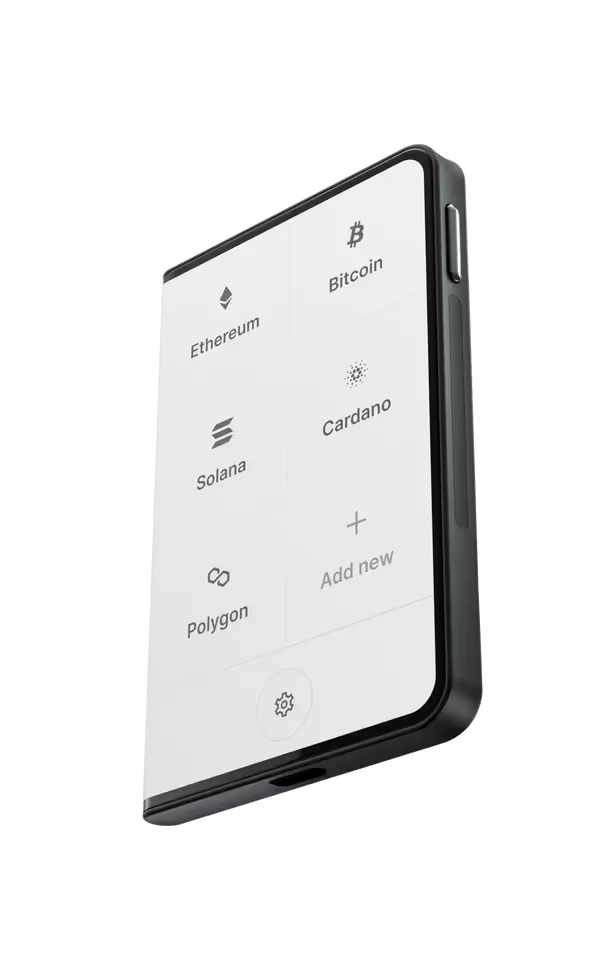
- Bis zu 100 Apps für 5,500 kompatible Krypto-Assets installierbar
- Mit 50+ Wallets kompatibel
- Zertifiziertes Sicherheitselement (CC EAL5+)
- 24-Wort Wiederherstellungsphrase
- Bluetooth® kompatibel mit Ledger Live Mobile
- 10 Stunden Standby-Mode
- E-Ink Touch-Display mit 3.7" Größe
- Schützende Magnethülle
- Kabelloses Laden mit Qi
- Einstellbarer Lockscreen
Ledger Live Software downloaden
Um den LEDGER NANO S Plus einzurichten und zu verwalten, benötigst du die Software LEDGER LIVE von der Webseite des Herstellers LEDGER WALLET.
Lade dir die aktuelle Version von LEDGER LIVE für die gewünschte Plattform herunter (für Windows, Apple Mac OS oder Linux).
Wenn der Download abgeschlossen ist, installiere die Software mit Doppelklick auf deinem Computer.

Nach der Installation starte das Programm LEDGER LIVE.

Ledger Nano S Plus einrichten
Wenn du deinen Ledger bereits eingerichtet hast, geht es hier weiter - Verwenden eines eingerichteten LEDGER NANO S Plus.
Sonst folge dieser Anleitung.
Mit Ledger Live kannst du:
- den Ledger Nano S Plus einrichten
- den LEDGER NANO S Plus wiederherstellen
- Ein bereits eingerichtetes Gerät einrichten
Wichtig - die Anleitung in Ledger Live dient wirklich nur als Anleitung - der Ledger kann komplett ohne Ledger Live direkt am Gerät eingerichtet werden. Du musst also jedes Mal, wenn du einen Einrichtungsschritt erledigt hast, in Ledger Live weiterklicken, um alle Erklärungen mit deinem Einrichtungsschritt synchron zu halten.
Keine Sorge, es ist einfacher, als du denkst.
Nachdem du Ledger Live gestartet hast, erscheint folgender Bildschirm:
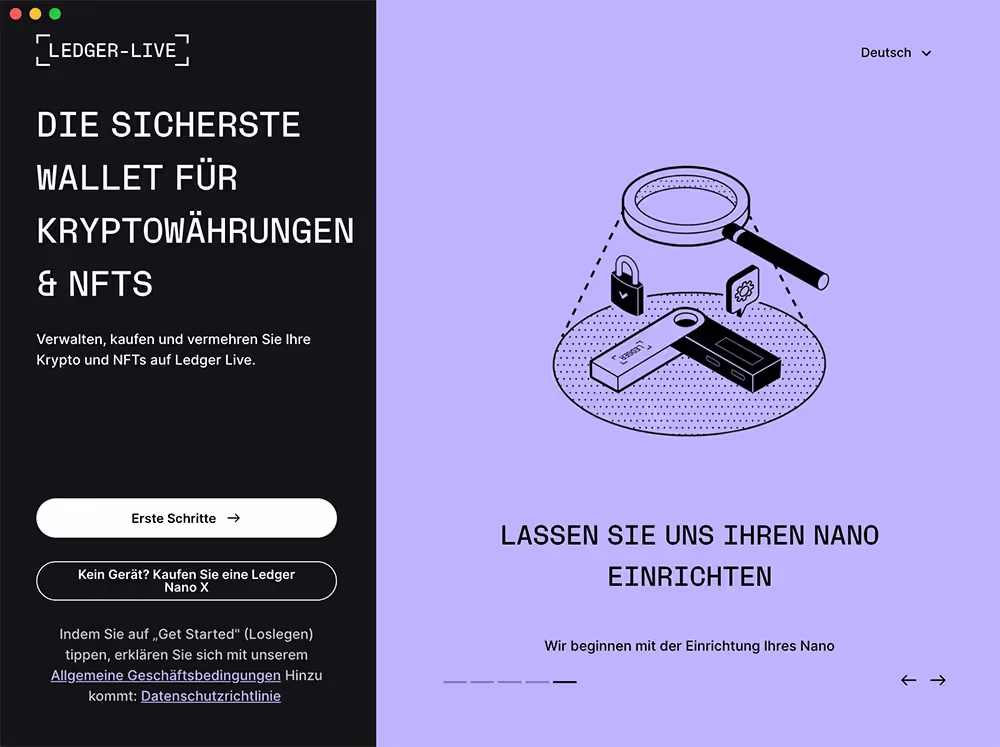
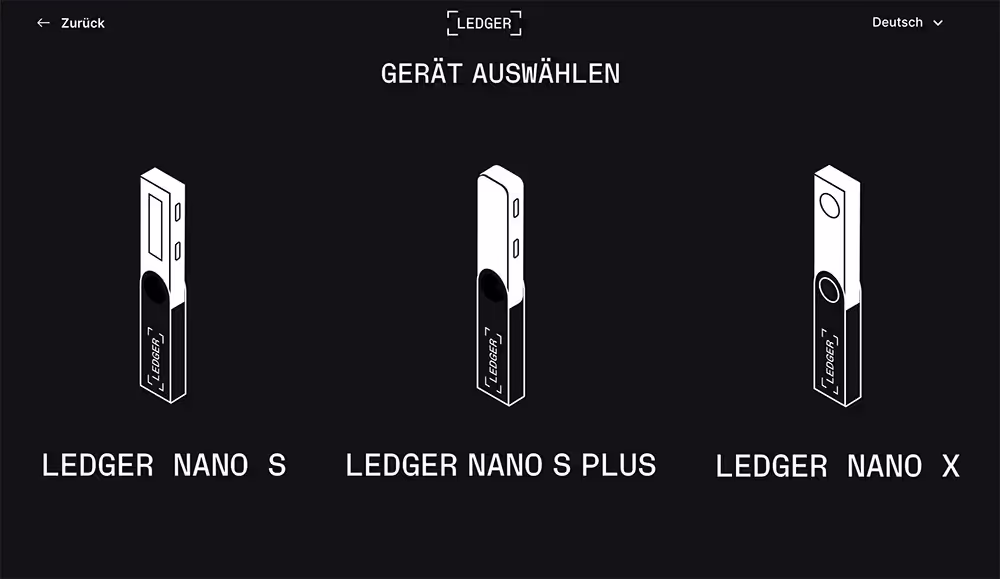
Klicke nun auf erste Schritte. Dann wähle das Gerät aus, das du einrichten möchtest. Wähle den Ledger Nano S Plus.
Hinweis: Der Prozess ist für den Ledger Nano S (Produkt eingestellt), den Ledger Nano S Plus und den Ledger Nano X gleich. Du kannst diese Anleitung also für alle drei Geräte verwenden.
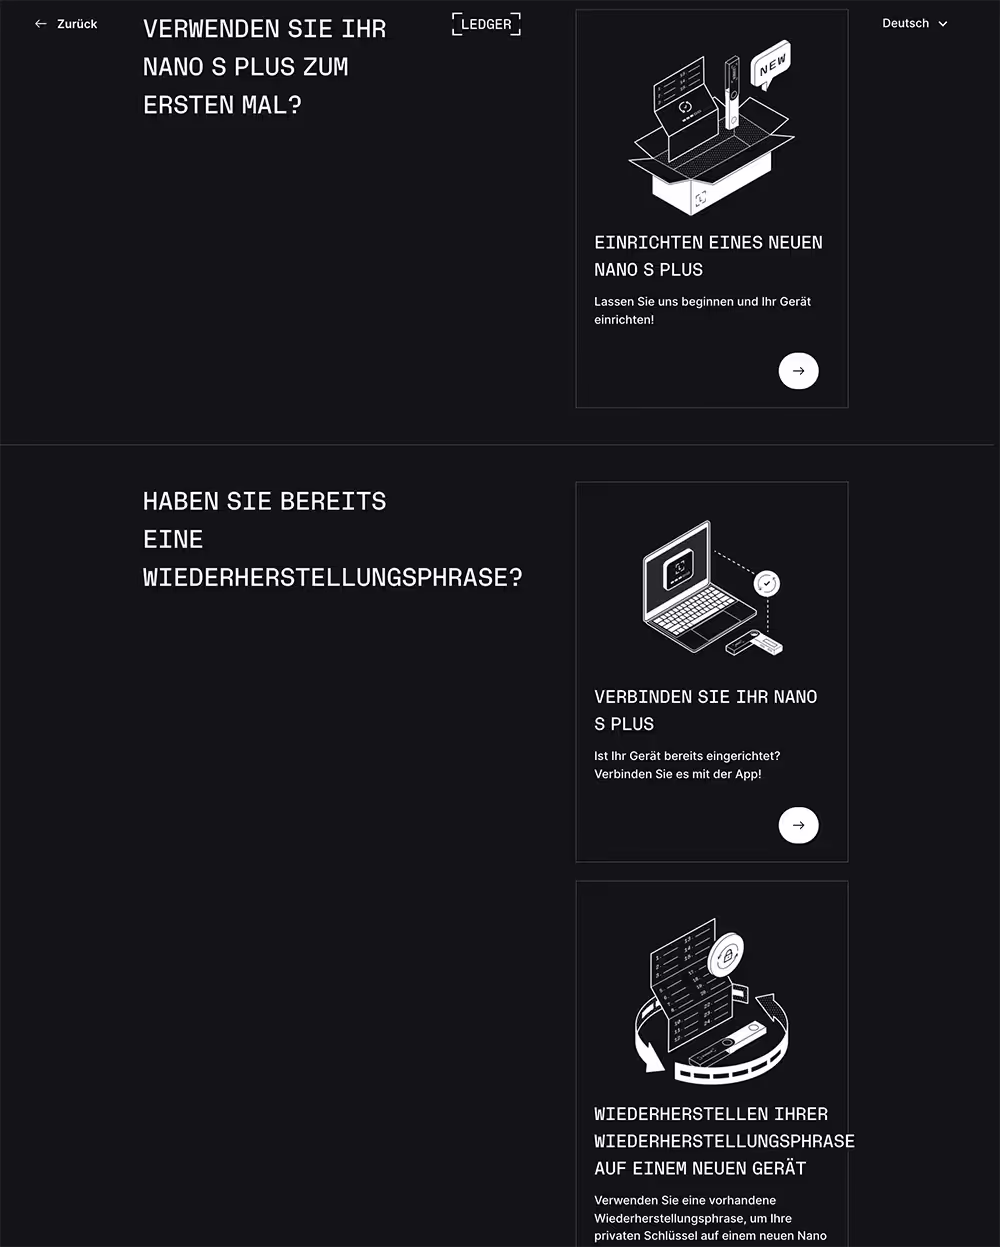
Anschließend wirst du gefragt, ob du:
- einen neuen Ledger Nano S Plus einrichten möchtest
- ein bereits eingerichtetes Gerät mit Ledger Live verbinden möchtest
- oder ein neues Gerät mit einer bestehenden Wiederherstellungsphrase einrichten möchtest
Da wir ein neues Gerät einrichten möchten, klicke auf Einrichten eines neuen Ledger Nano S Plus
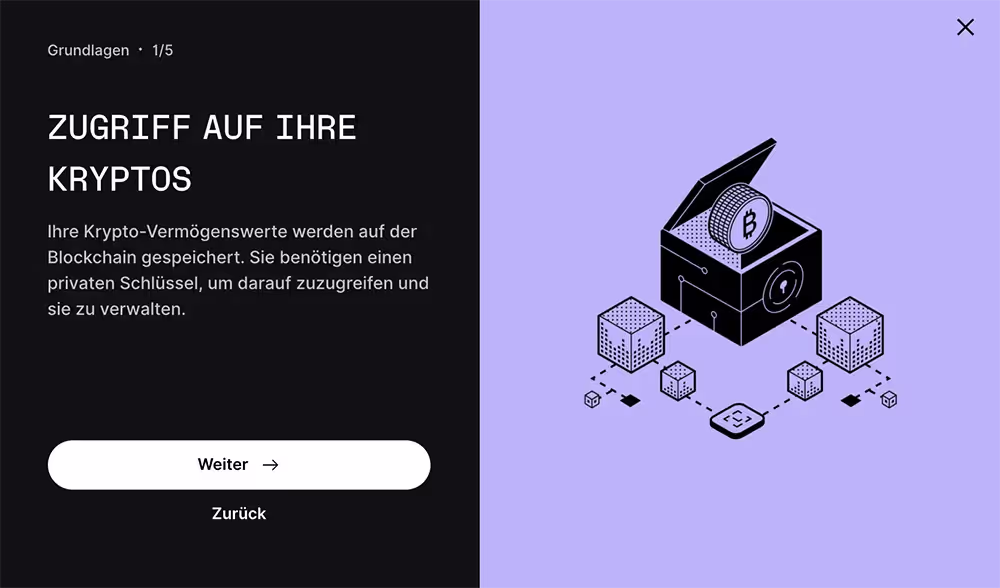
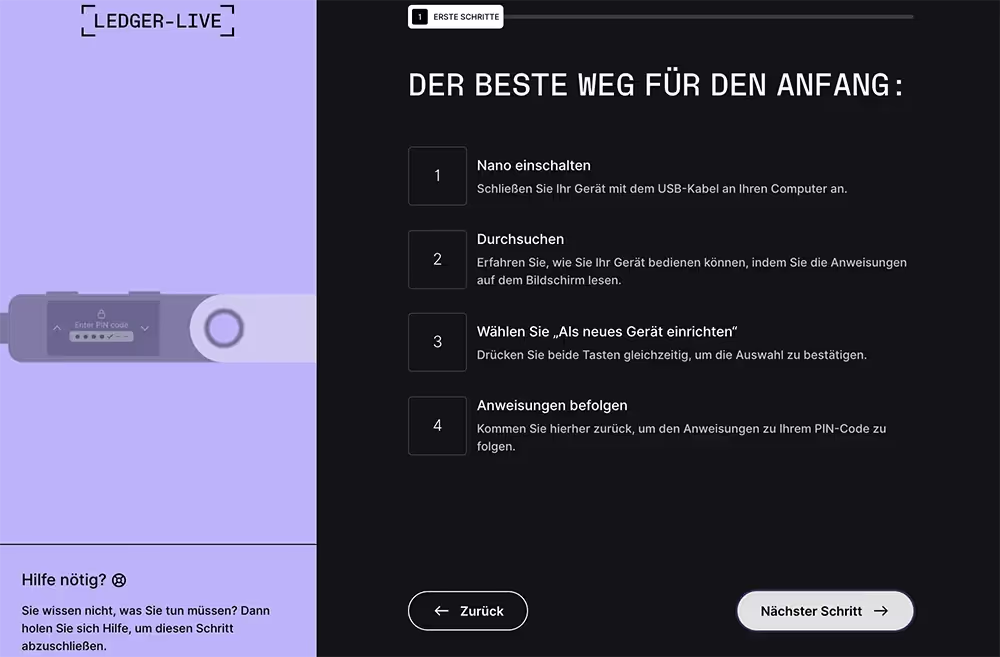
Anschließend werden 5 Karten mit Grundlagen zum Ledger angezeigt. Lies dir diese durch und klicke immer auf weiter.
Dann folgen die ersten Schritte der Einrichtung. Klicke auf OK, ich bin bereit.

Das wird nun in Ledger Live angezeigt. Verbinde deinen Ledger mit dem USB-Kabel und schalte ihn ein. Klicke Nächster Schritt.
Die Nachricht "Welcome to Ledger Nano S. Press right button to continue" scheint auf deinem Ledger auf.
Hinweis: In diesem Bild wird der Startbildschirm des Ledger Nano X angezeigt. Bis auf den Namen ist die Einrichtung aller Ledger Hardware Wallets komplett identisch und kann für alle Ledger Wallets verwendet werden.
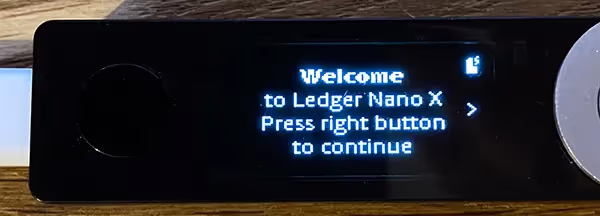
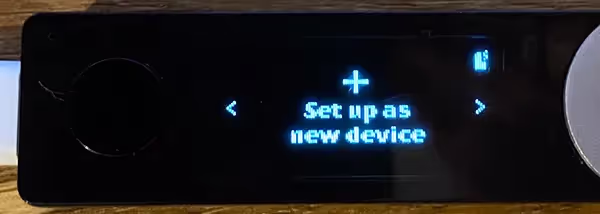
Klicke mit dem rechten Button und lies dir alle Meldungen durch, bis zu du "Set up new device" kommst. Klicke nun beide Tasten gleichzeitig.
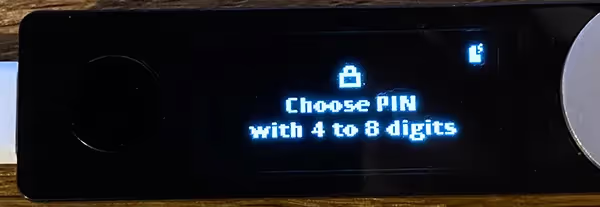
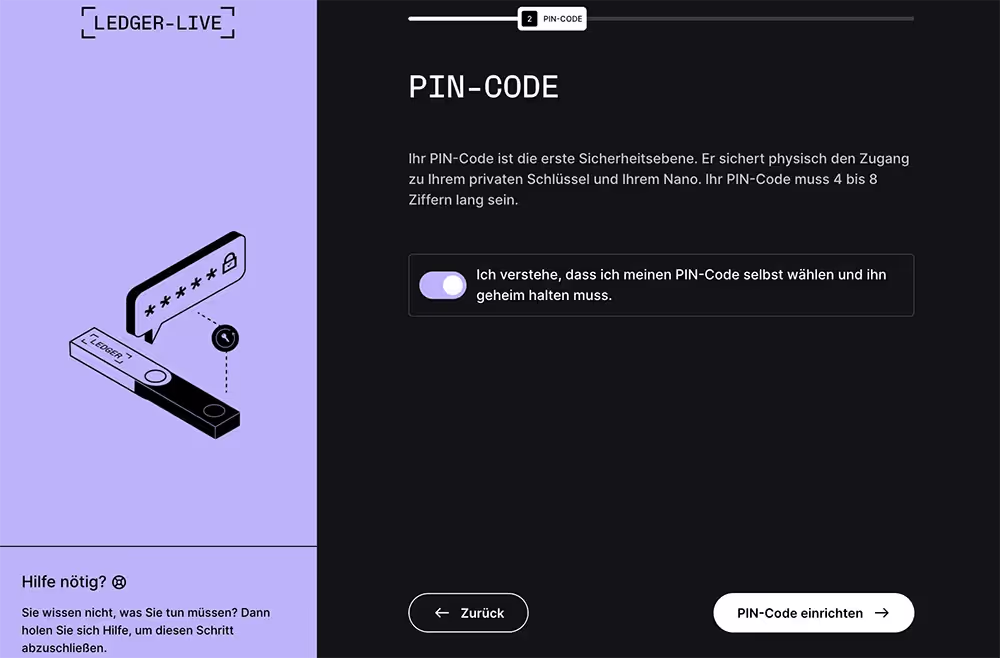
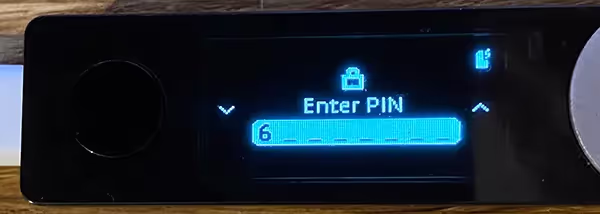
Du wirst nun aufgefordert, einen PIN-Code festzulegen. Dieser kann 4 bis 8 Stellen enthalten. Klicke auf beide Tasten.
Klicke jetzt in Ledger Live auf PIN-Code einrichten.
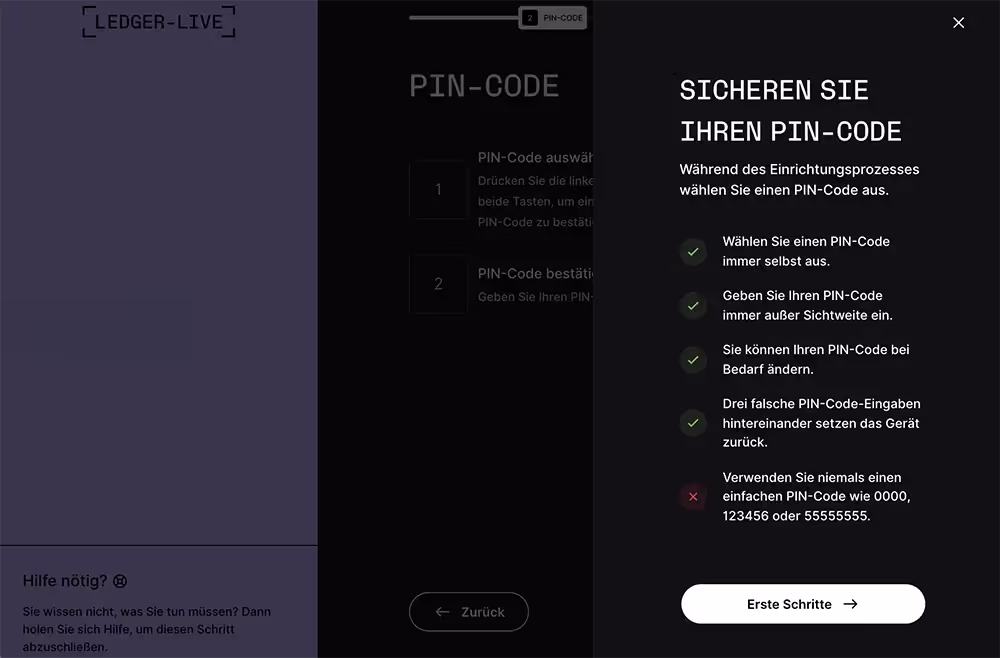
Lies dir alles durch und klicke Nächster Schritt.
Klicke Erste Schritte.
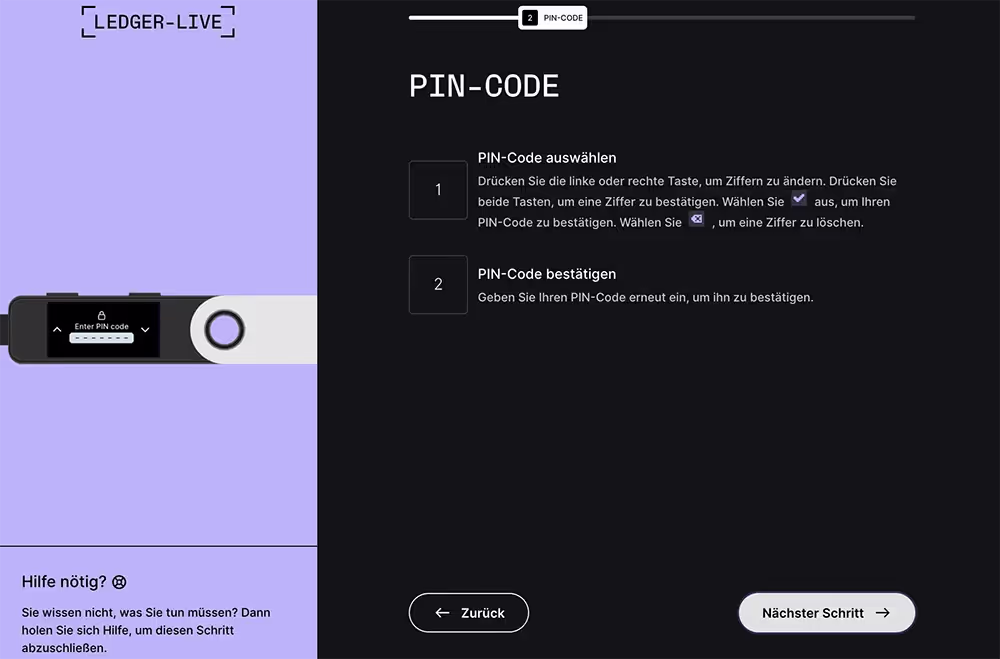
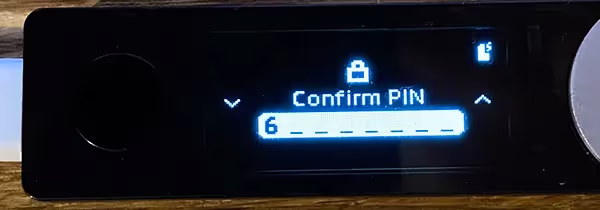
Lege nun den PIN-Code fest. Wähle die Ziffern mit der rechten und linken Taste, bestätige eine Ziffer mit Klick auf beide Tasten.
Bestätige anschließend deinen PIN, indem du ihn nochmal eingibst. Bestätige den PIN-Code mit Klick auf beide Buttons.
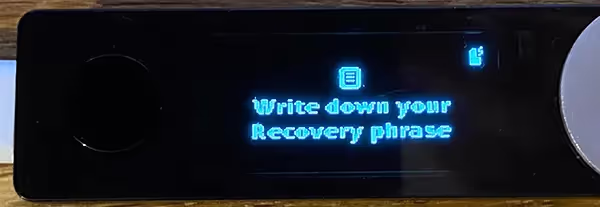
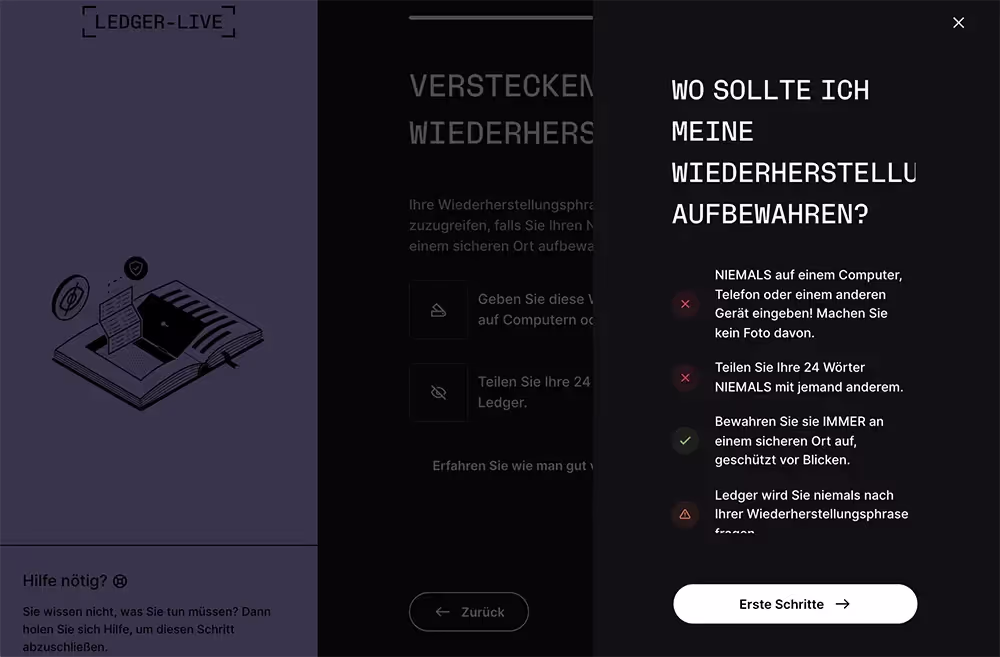
Klicke in Ledger Live auf Wiederherstellungsphrase.

Am Ledger Nano S Plus wird nach dem PIN-Code Write down your Recovery Phrase angezeigt. Klicke mit beiden Buttons und folge den Anweisungen am Gerät.
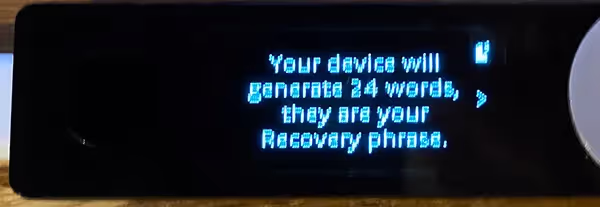
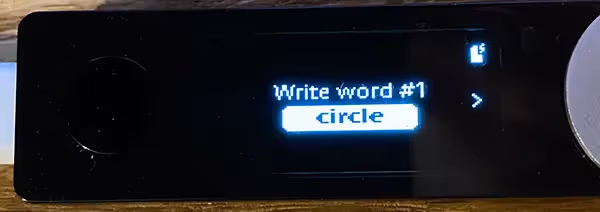
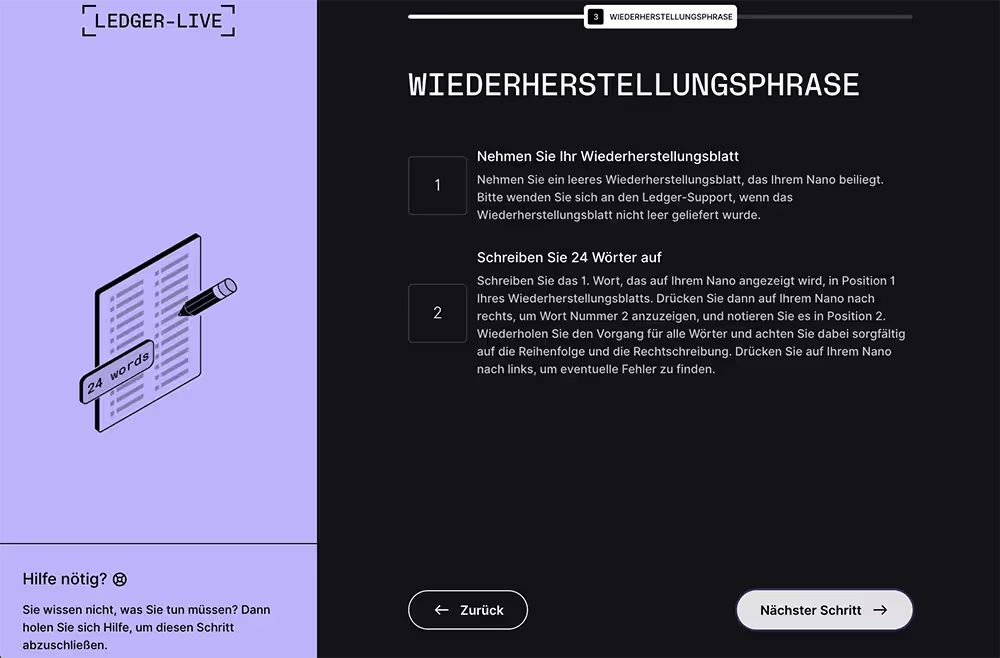
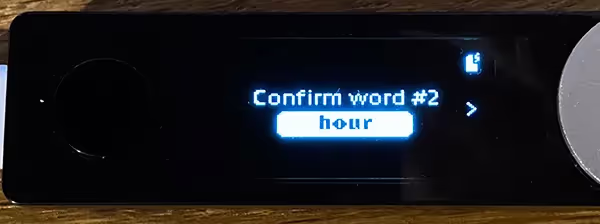
Schreibe nun alle 24 Wörter vom Ledger auf den Wiederherstellungszettel. Klicke nun in Ledger Live auf Nächster Schritt.
Klicke Nächster Schritt.

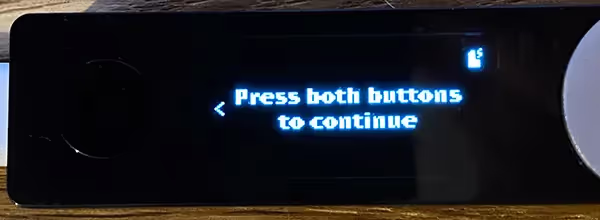
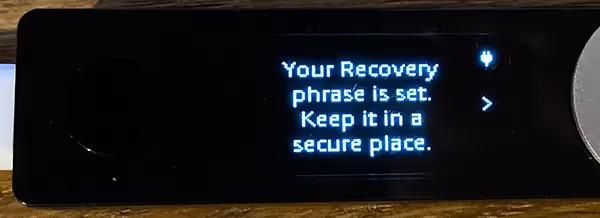
Bestätige nun alle 24 Wörter der Wiederherstellungsphrase am Ledger. Klicke dafür beide Buttons.
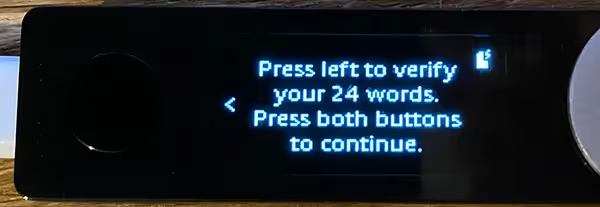
Klicke beide Buttons.
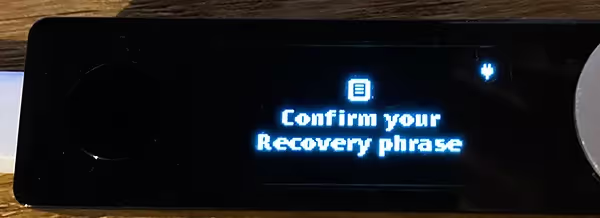
Klicke den rechten Button und prüfe alle Wörter.
Klicke den rechten Button.
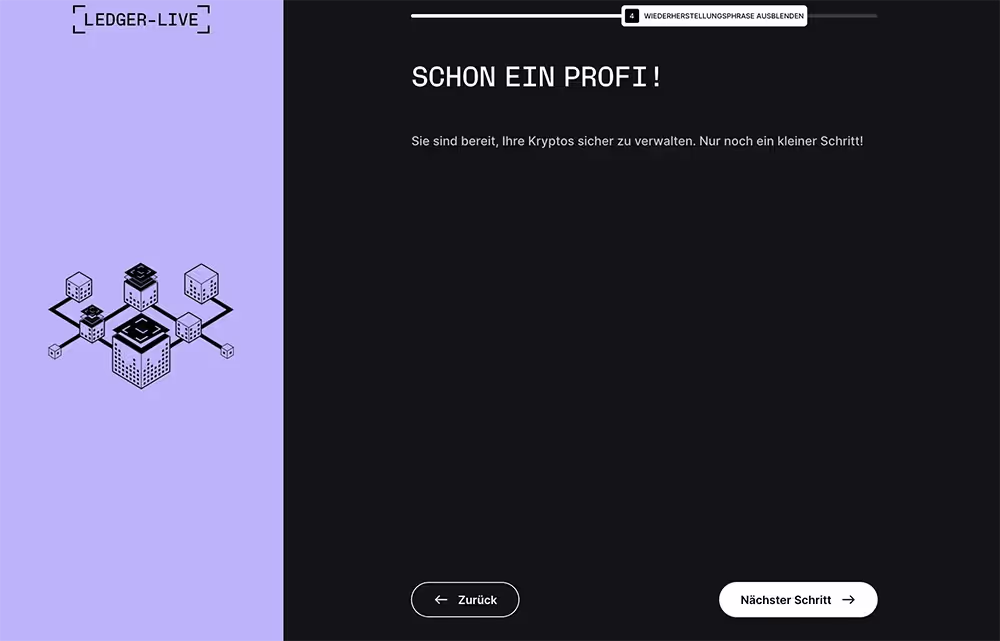
Dein Gerät ist nun bereit!
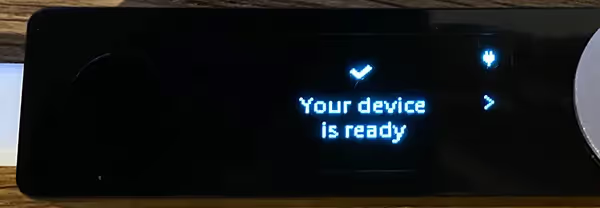
Klicke Erste Schritte in Ledger Live.

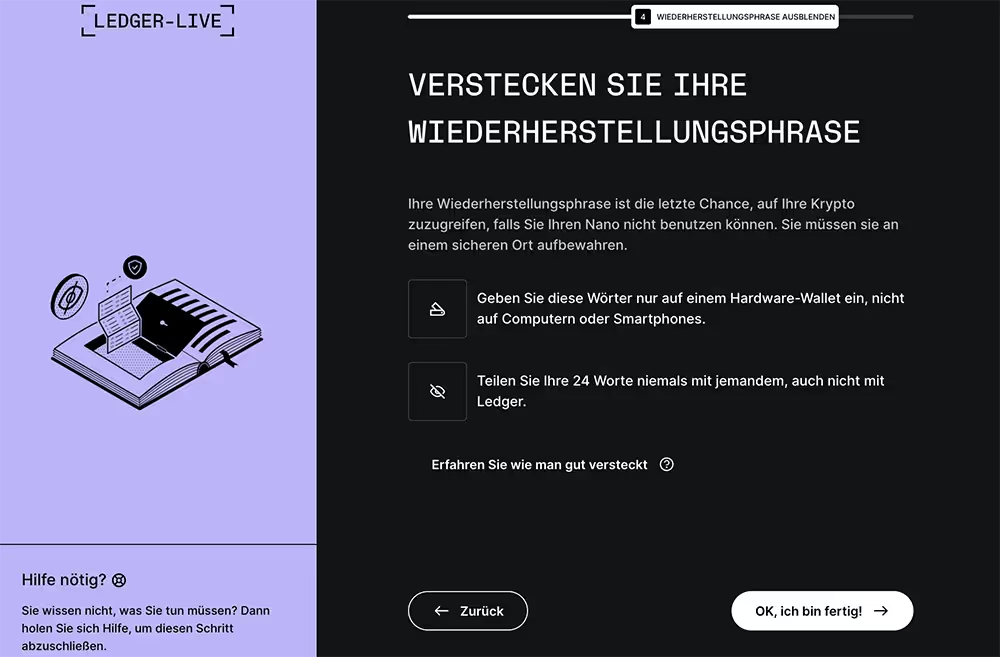
Klicke OK, ich bin fertig!
Klicke Erste Schritte.
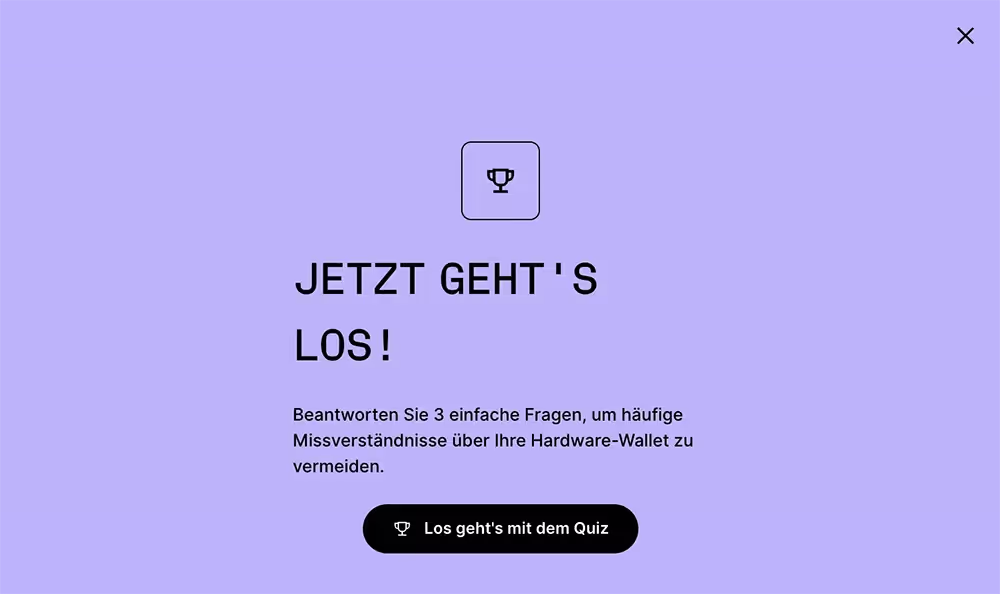
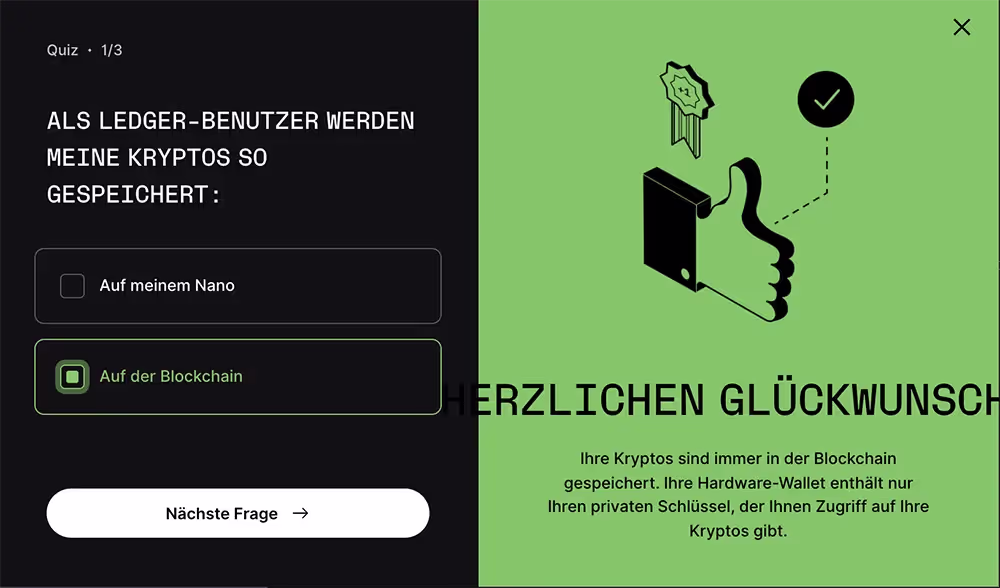
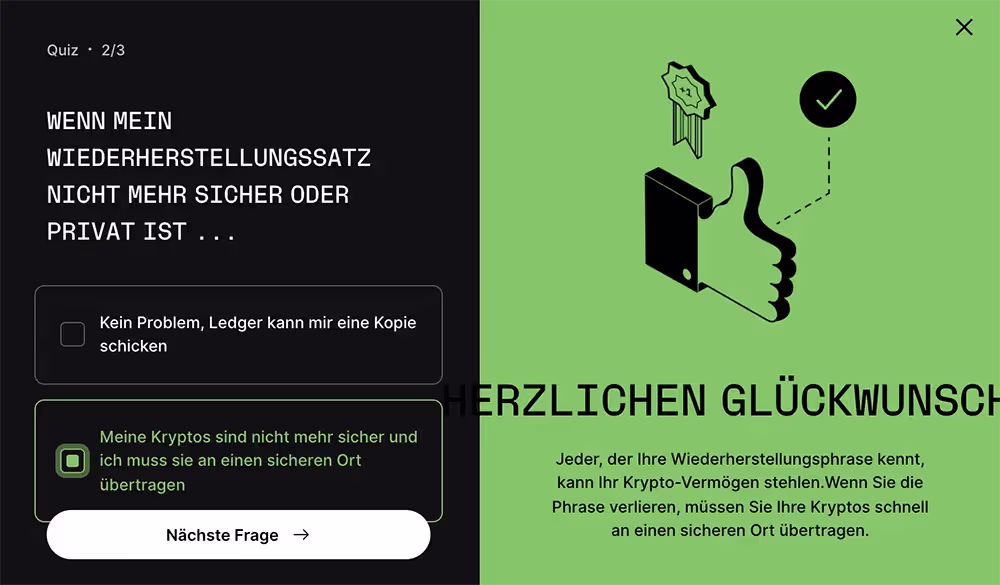
Anschließend kannst du optional ein Quiz absolvieren, oder es mit dem X oben rechts wegklicken.
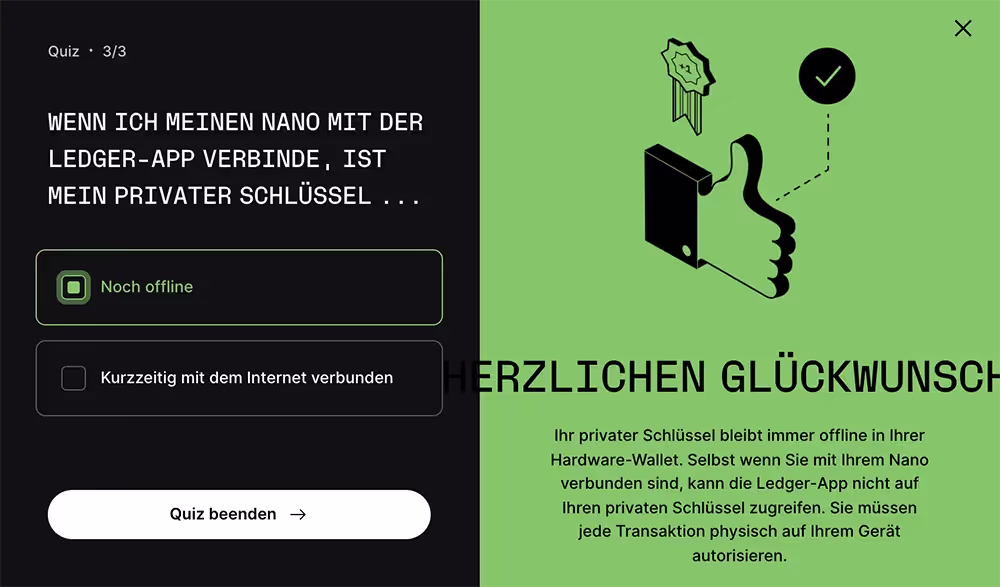
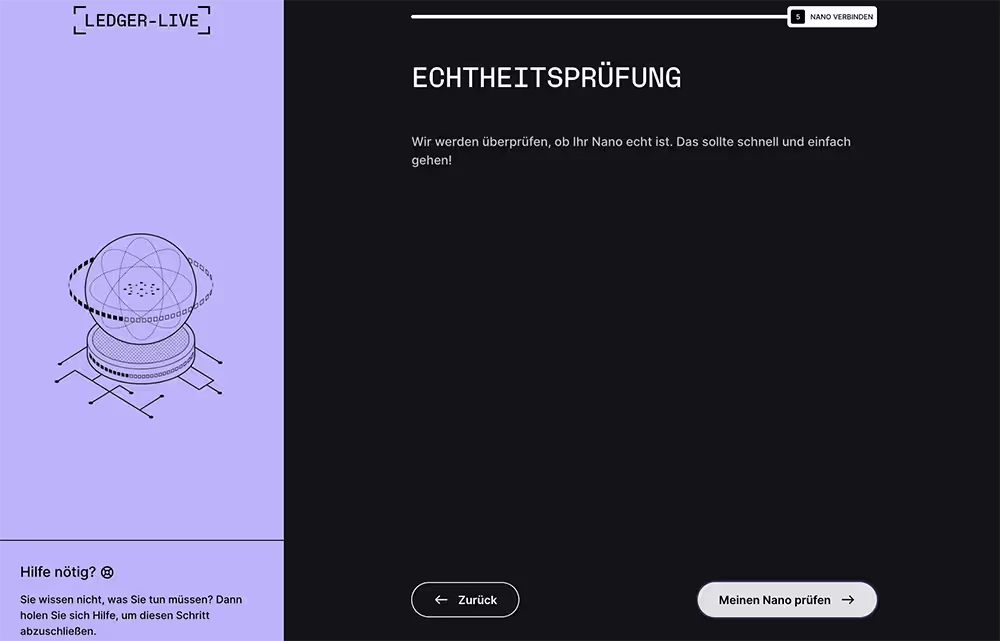
Nach dem Quiz geht es zur Echtheitsprüfung deines Ledgers. Klicke dafür Nächster Schritt.
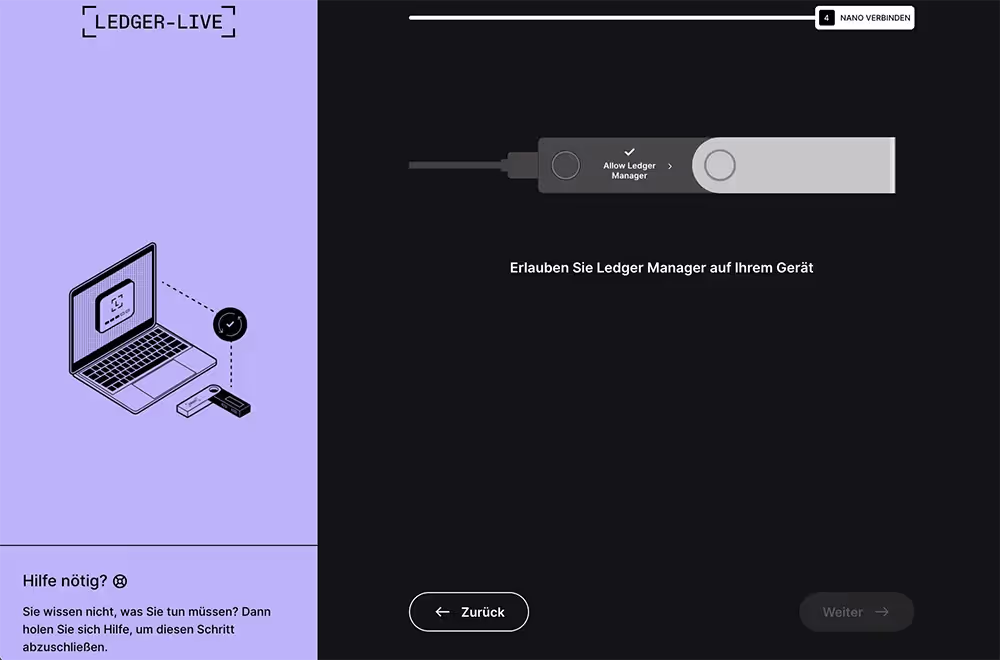
Dann wird die Echtheitsprüfung deines Ledgers gemacht. Dafür muss der Ledger mit dem Kabel am Computer angeschlossen sein. Klicke auf Meinen Nano prüfen.
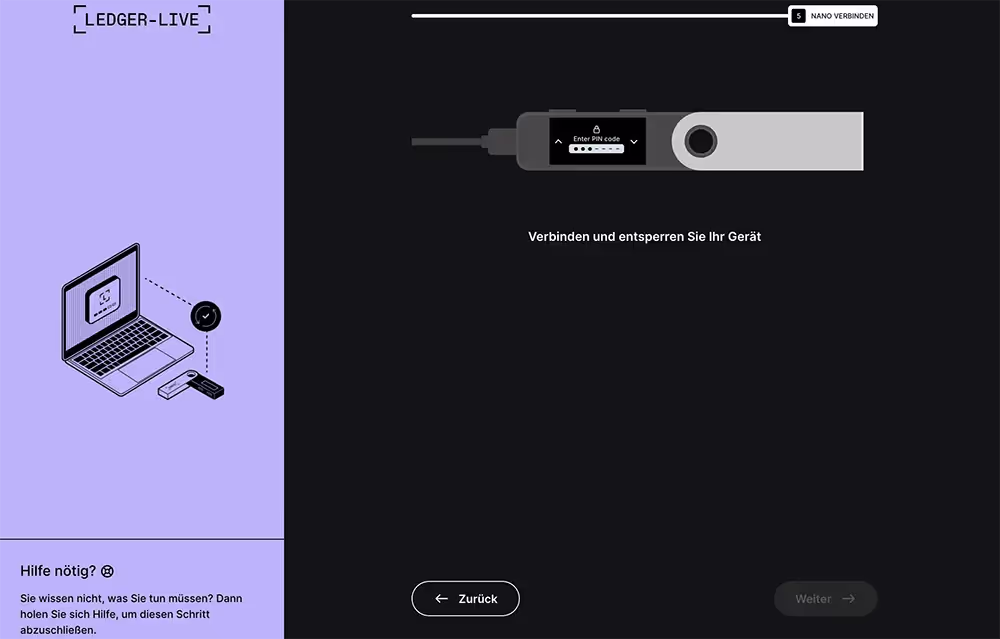
Verbinde und entsperre deinen Ledger Nano S Plus. Dann klicke auf Weiter.
Um die Prüfung zu starten, erlaube auf dem Ledger mit einem Klick auf beide Buttons den Ledger Manager.
Dein Ledger wird geprüft. Wenn alles passt, klicke auf Weiter.
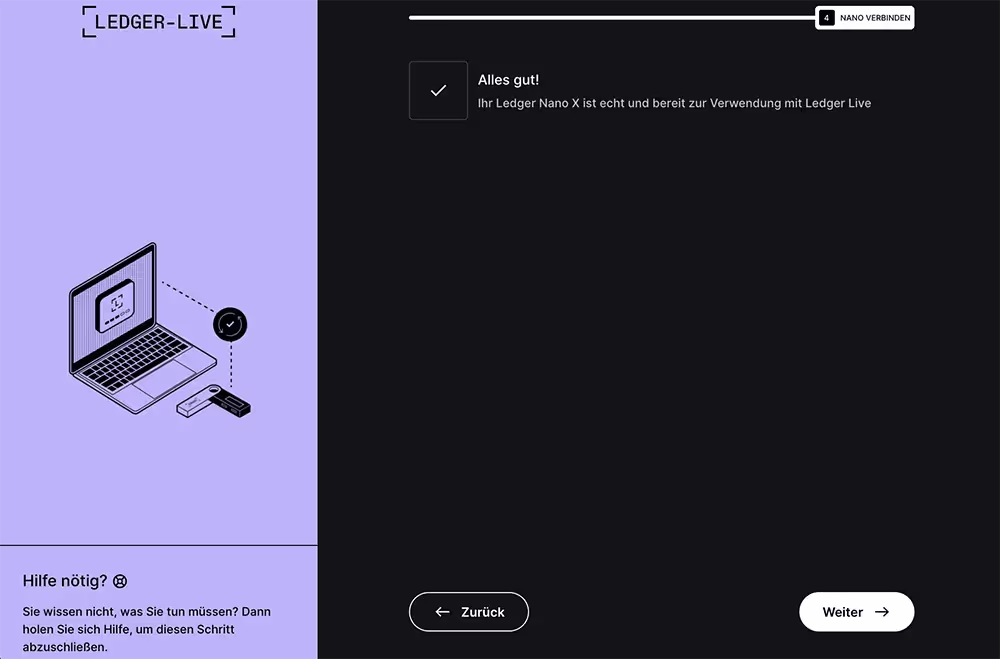
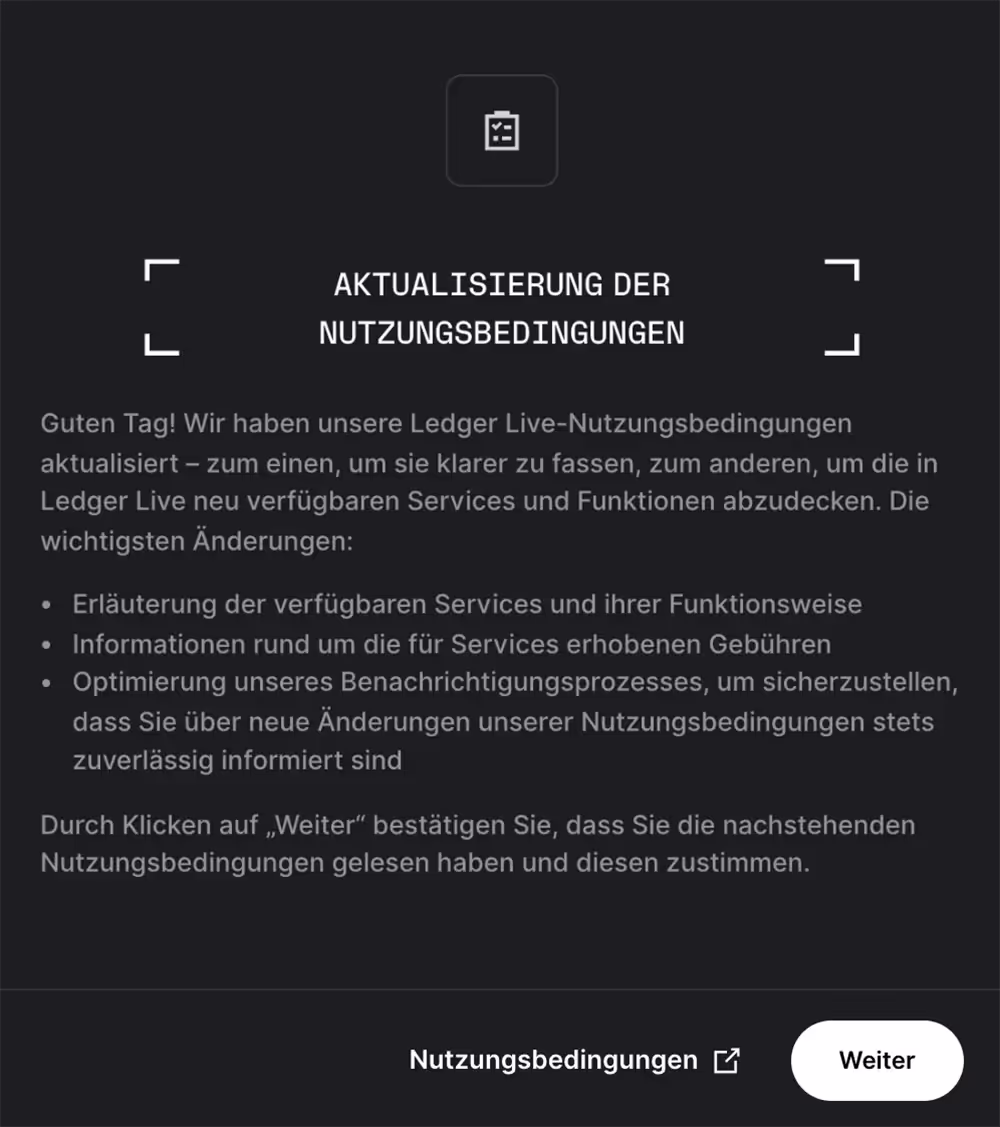
Nach der Anzeige der Nutzungsbedingungen ist dein Ledger fertig eingerichtet!
Verwenden eines eingerichteten Ledger Nano S Plus
Wenn du deinen Ledger Nano S Plus bereits einmal eingerichtet hast (das kannst du auch ohne Ledger Live Software machen, indem du den Instruktionen auf dem Ledger nach dem Einschalten folgst), klicke auf Verbinden Sie Ihr Nano S Plus.
Es folgt nun eine Prüfung der Echtheit deines Ledgers. Nach dem Abschluss der Prüfung wirst du auf das Dashboard von Ledger Live geleitet.
Bitcoin Wallet installieren
Nach der Konfiguration des eingerichteten LEDGER NANO S Plus öffnet sich das Dashboard LEDGER LIVE. Wir sehen uns nun die Schritt an, wie man ein Bitcoin Wallet, auf dem die Informationen zu deinen Bitcoins in der Blockchain gespeichert sind, installiert.
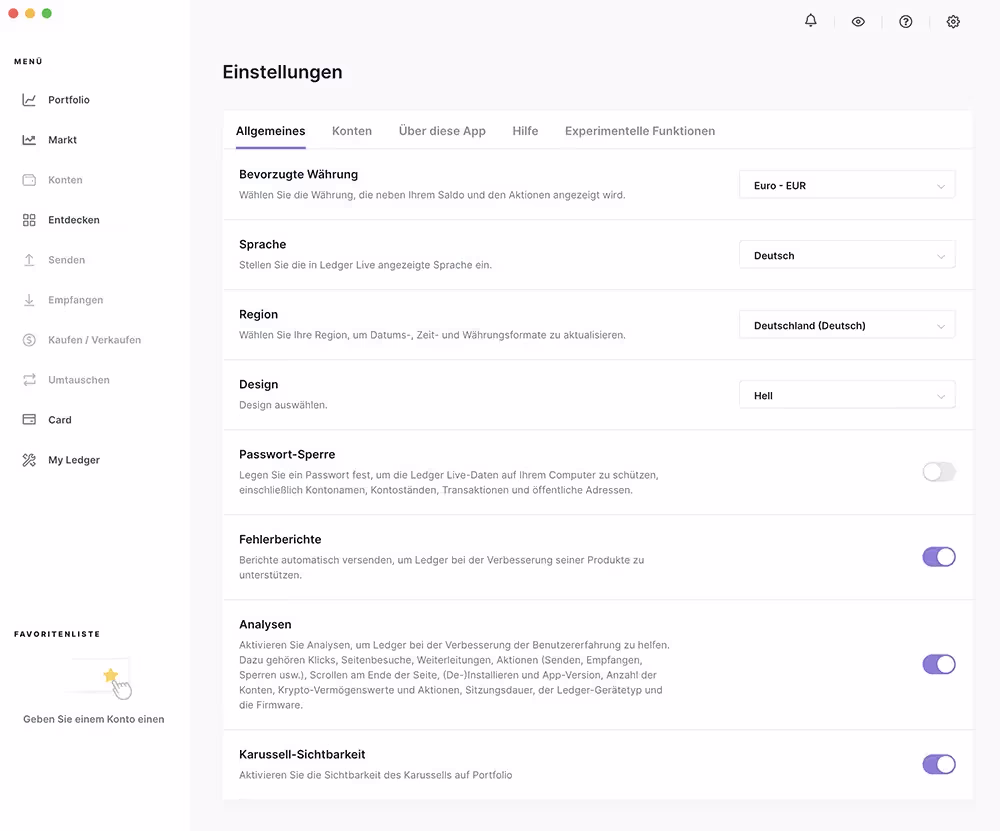
Zuerst regeln wir unter Einstellungen (das kleine Zahnrad oben rechts) die generellen Einstellungen der LEDER LIVE Software. Hier kann man die gewünschte Währungsanzeige, die Systemsprache der Software, das Design (hell oder dunkel) oder die Änderung des Passworts für LEDGER LIVE einrichten.
Setze deine Einstellungen nach deinen Wünschen fest.
Nun klicken wir auf My Ledger. Hier wird der Katalog an installierbaren Wallets für den LEDGER NANO S Plus angezeigt.
Nun klicken wir auf Installieren beim Bitcoin Wallet.
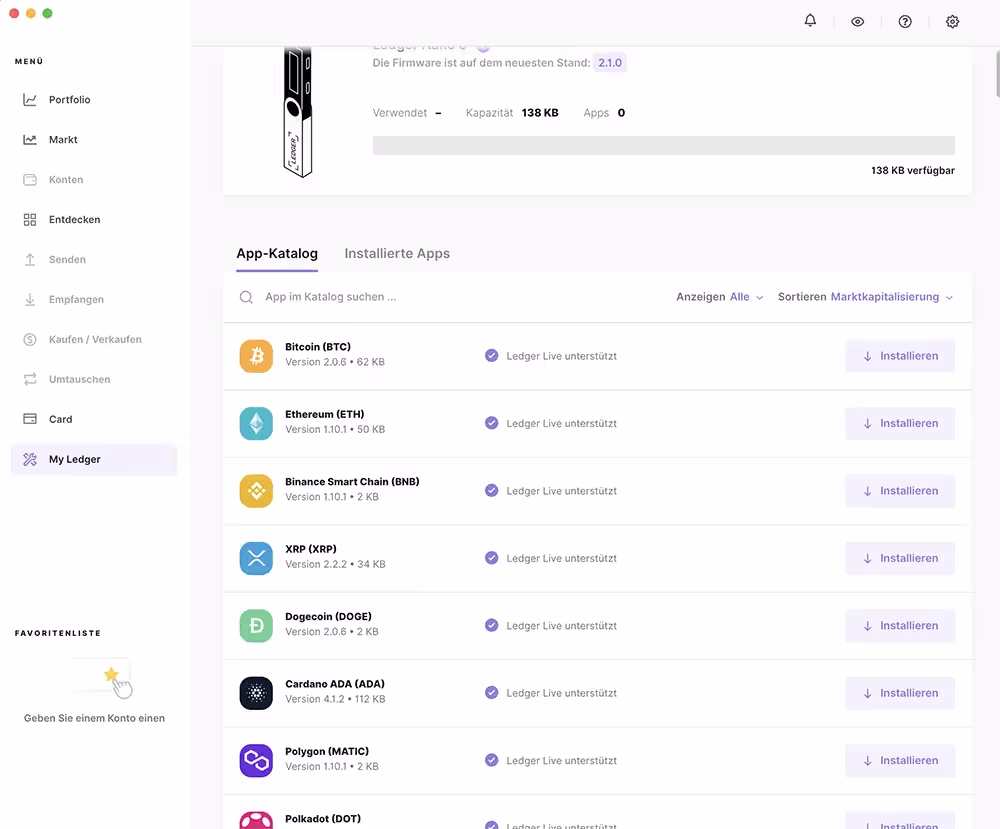
Daraufhin wird das Wallet auf dem Gerät installiert.

Hinweis: Der Speicherplatz auf einem Hardware Wallet ist begrenzt. Es kann also nur eine beschränkte Anzahl von Wallets installiert werden (bei Ledger Nano S Plus ca. 100 Wallets). Solltest du weitere Wallets installieren wollen, um andere Kryptowährungen auf dem Gerät zu verwalten, kannst du problemlos ein installiertes Wallet löschen.
Das ist deshalb kein Problem, da auf dem Gerät KEINE Bitcoins und andere Kryptowährungen gespeichert werden - es wird mit dem Wallet nur die Information von der Blockchain abgerufen, die angibt, dass du der Besitzer dieser Kryptowährung bist. Wenn du also ein Wallet löscht, wird nur diese Info gelöscht, nicht aber deine Bitcoins selbst.
Wenn du später das gelöschte Wallet wieder installierst, wird die Information wieder im Wallet angezeigt und du kannst wieder deine Kryptowährungen verwalten. Ein Löschen des Wallets ist also kein Problem.
Konto einrichten
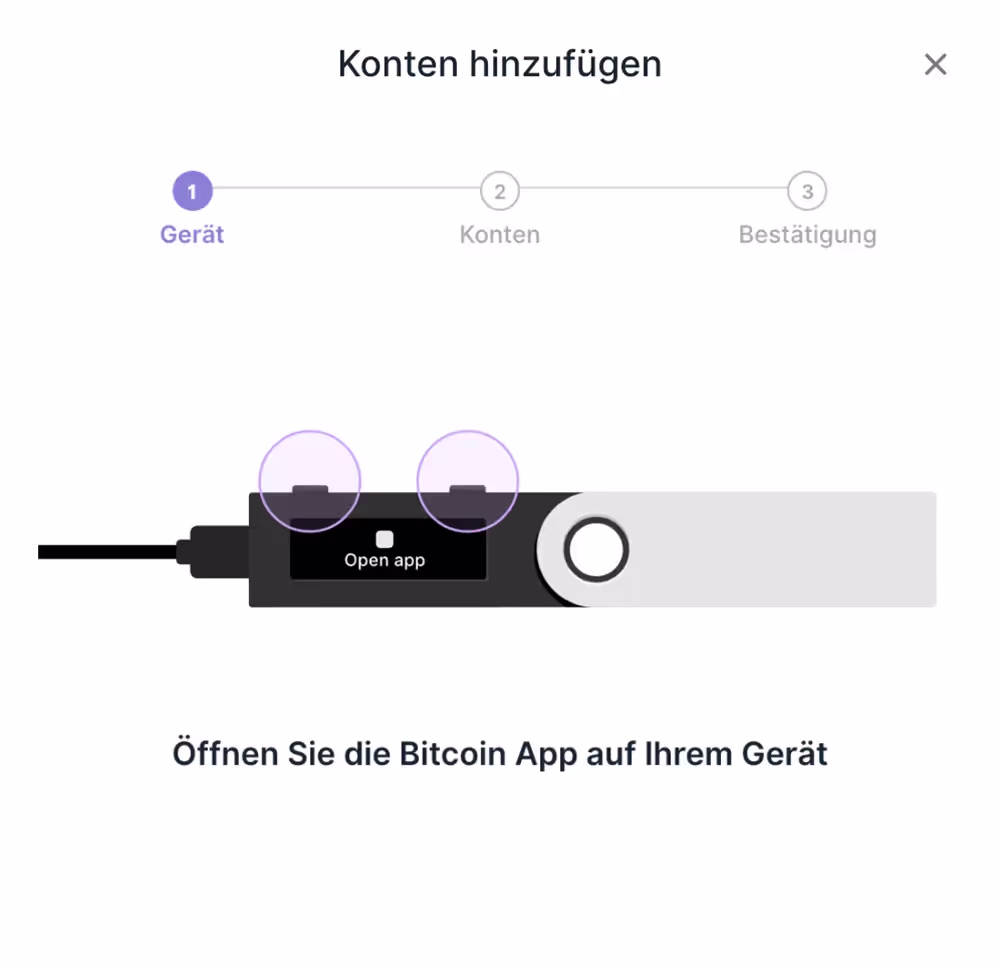
Nun richten wir ein KONTO für das Bitcoin Wallet ein. In My Ledger klicke auf Konto hinzufügen bei deinem fertig installierten Bitcoin Wallet.

Öffne nun die Bitcoin App auf deinem Ledger, indem du gleichzeitig auf beide Buttons deines Ledgers klickst.
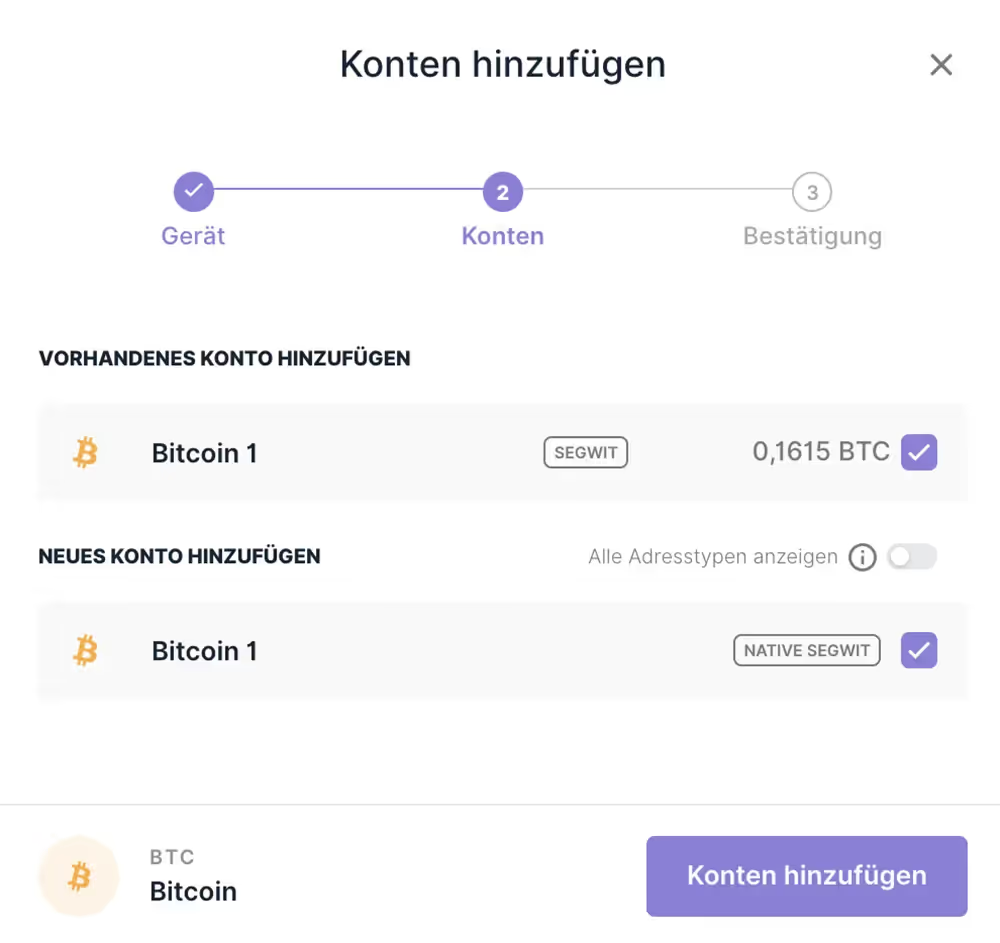
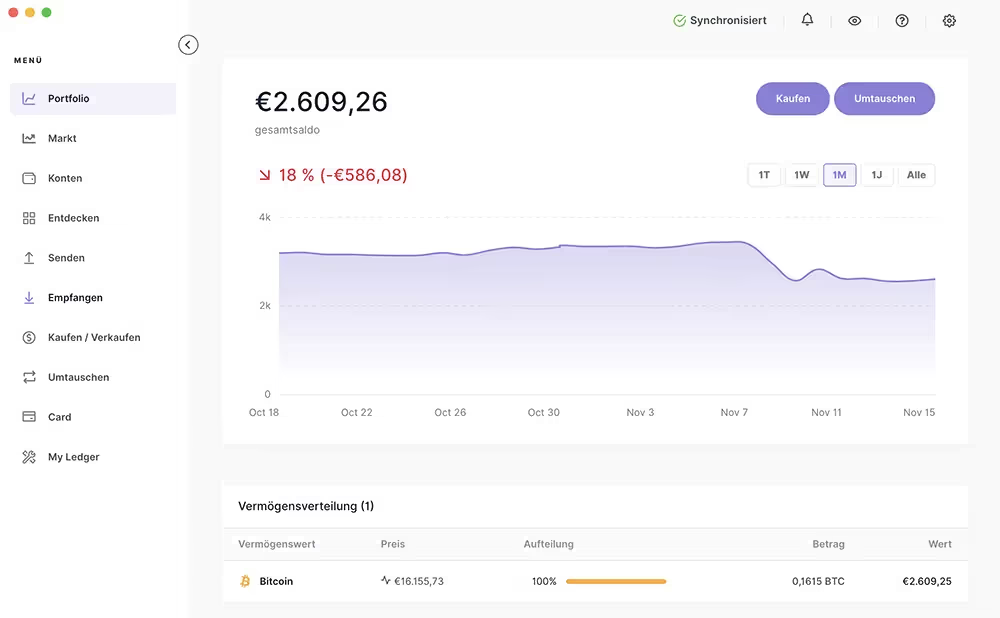
Nun werden dir bereits bestehende oder neue Konten auf der Blockchain angezeigt. In diesem Beispiel gibt es bereits ein Konto, auf dem 0.16 Bitcoin liegen. Weiters kann man hier ein neues Konto hinzufügen. Bei einem neuen, leeren Konto wird nur ein Konto angezeigt. Du kannst die Konten auch benennen.
Klicke auf Konten hinzufügen.
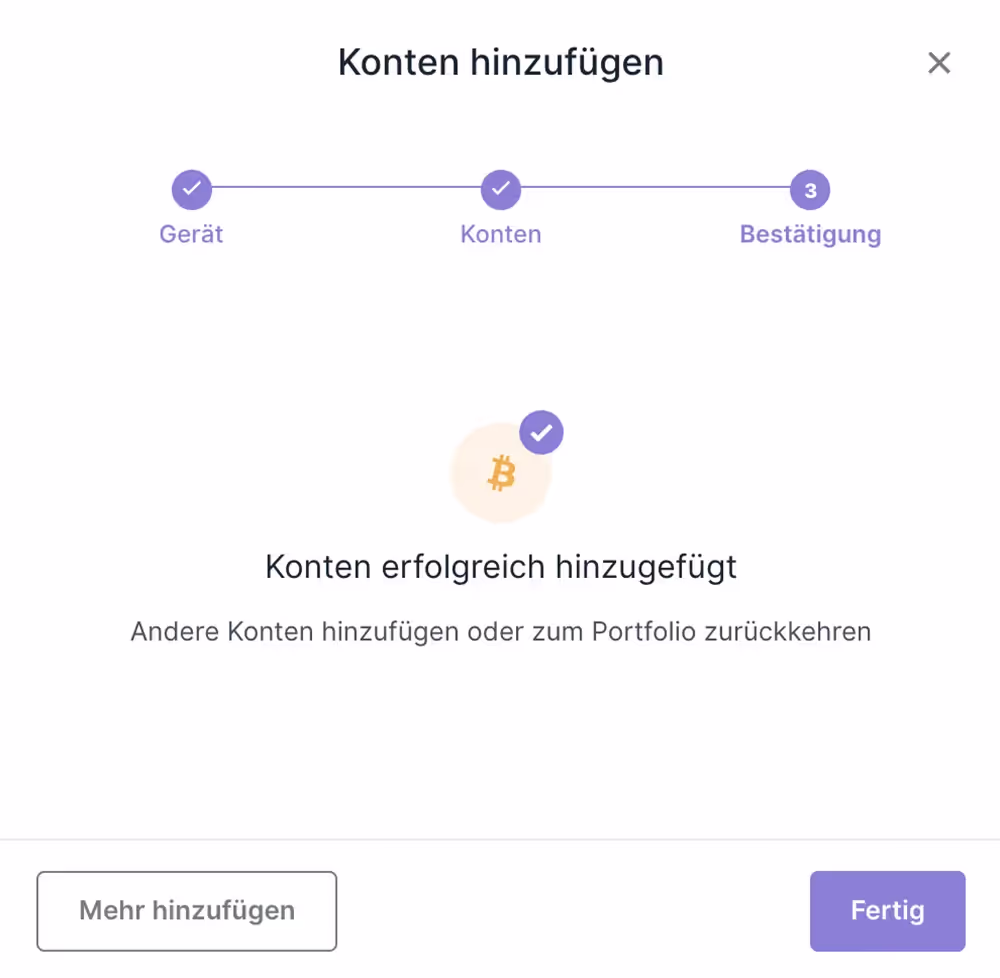
Damit ist die Einrichtung deines Bitcoin Kontos am Ledger abgeschlossen.
Im Menüpunkt Portfolio wird nun dein Kryptoportfolio angezeigt, dass im Moment nur aus Bitcoin besteht.
Du bist nun bereit, deine Kryptowährungen vom Online-Wallet bei Bitpanda auf deinen Ledger Nano S Plus zu transferieren.
Bitcoins transferieren
Um genau zu sein werden bei diesem Prozess keine Bitcoins transferiert, sondern nur auf die Information zugegriffen, wo sich deine Bitcoins auf der Blockchain befinden. Der Einfachheit halber benutzen wir aber trotzdem den Begriff TRANSFERIEREN.
Um Bitcoins zu transferieren, musst du sie zunächst Bitcoin kaufen.
Wir verwenden für diese Anleitung die Börse Bitpanda aus Österreich.
Logge dich in deinen Bitpanda Account ein und klicke in der oberen Menüleiste auf den Button Senden.

Es werde nun die Online Wallets angezeigt, auf denen du bei Bitpanda deine Kryptowährungen gespeichert hast. Wähle das Bitcoin (BTC) Wallet.

Im nächsten Schritt wirst du aufgefordert, eine Zieladresse (nämlich die deines LEDGER NANO S Plus) einzugeben.
Achtung - die hier angeführte E-mail-Adresse oder der Empfänger ist nur dafür gedacht, wenn du Assets an Kontakte senden möchtest, die du in Bitpanda angelegt hast. Du kannst mit diesen Informationen KEINE Assets an dein Hardware Wallet senden!

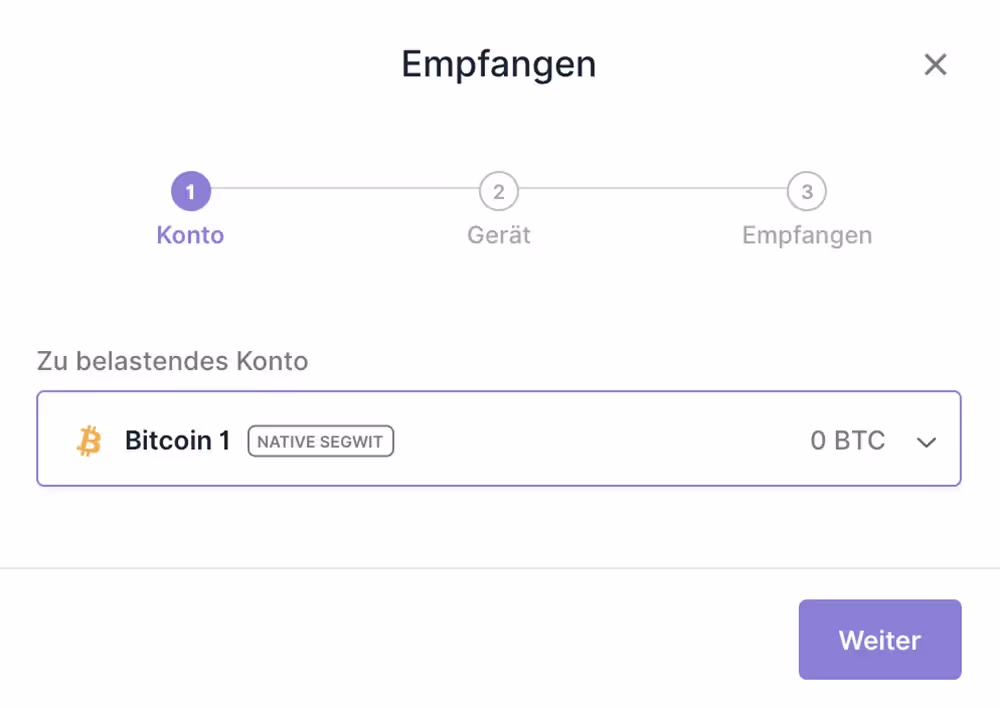
Um diese Empfänger-Adresse zu bekommen, öffne LEDGER LIVE und klicke im linken Menü auf Empfangen.
Wähle nun das Bitcoin Konto aus, auf das du deine Bitcoins senden möchtest. Dann klicke auf weiter.
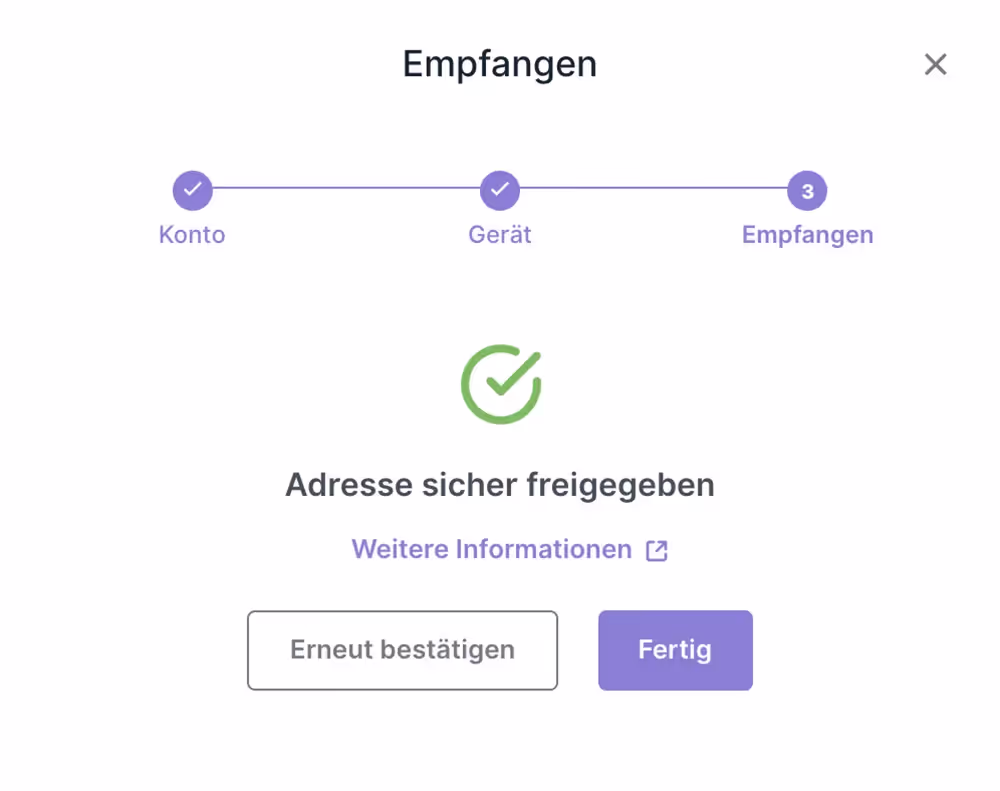
Es wird nun die Empfangsadresse für Bitcoins für dein LEDGER-Gerät angezeigt (hier unkenntlich gemacht, damit hier keine falschen Adressen übernommen werden). Kopiere diese Adresse (wenn du auf das Symbol neben der Adresse klickst, wird die Adresse kopiert).
Falls nicht schon geschehen, verbinde deinen LEDGER NANO S Plus mit dem Computer und öffne dein zuvor installiertes Bitcoin Wallet auf dem Ledger durch gleichzeitiges Klicken auf die beiden Tasten.

Mit Bestätigung am Ledger wird die Adresse für den Empfang von Bitcoin freigegeben.
Wieder zurück in Bitpanda, füge die zuvor aus Ledger Live kopierte Adresse in dem freien Feld ein und klicke auf OK.
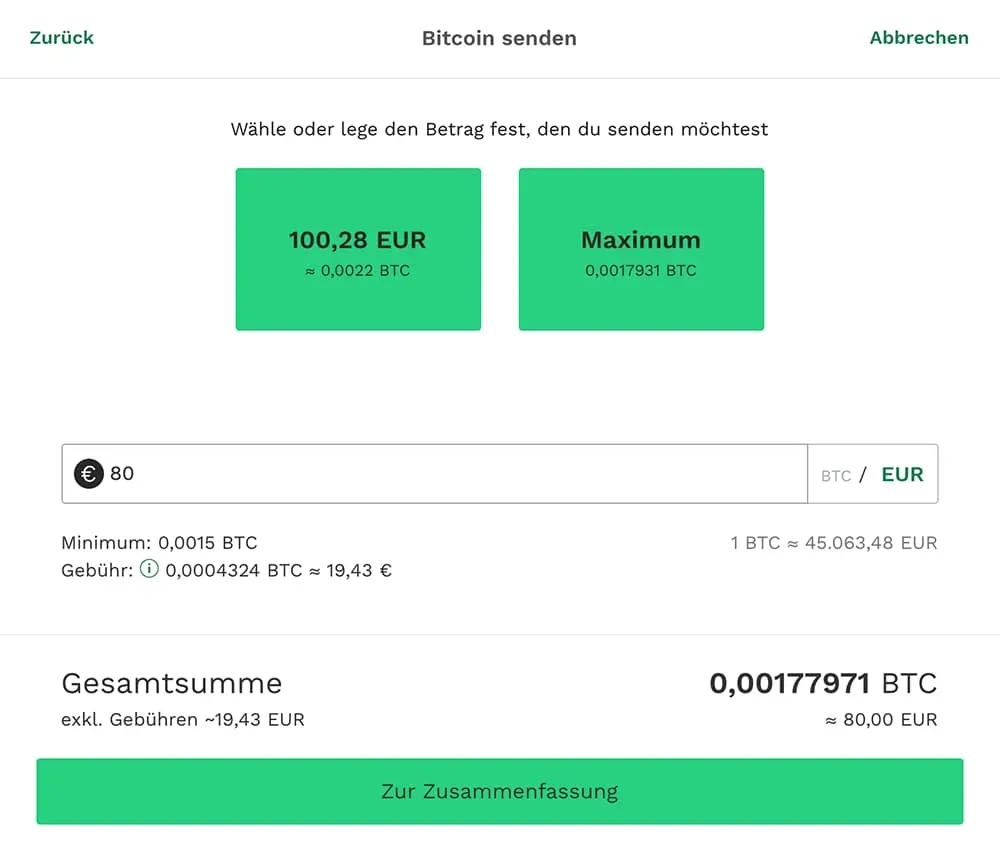
Im folgenden Schritt legst du fest, wie viele von den auf Bitpanda gespeicherten Bitcoins du auf den LEDGER NANO S transferieren möchtest.
ACHTUNG - es wird bei jedem Transfer eine Gebühr verrechnet, die dir von deinen BITCOINs abgezogen wird. Diese wird dir hier angezeigt und kann je nach Auslastung des Systems höher oder niedriger ausfallen.
Wenn du den Betrag eingegeben hast, klicke auf Zur Zusammenfassung.
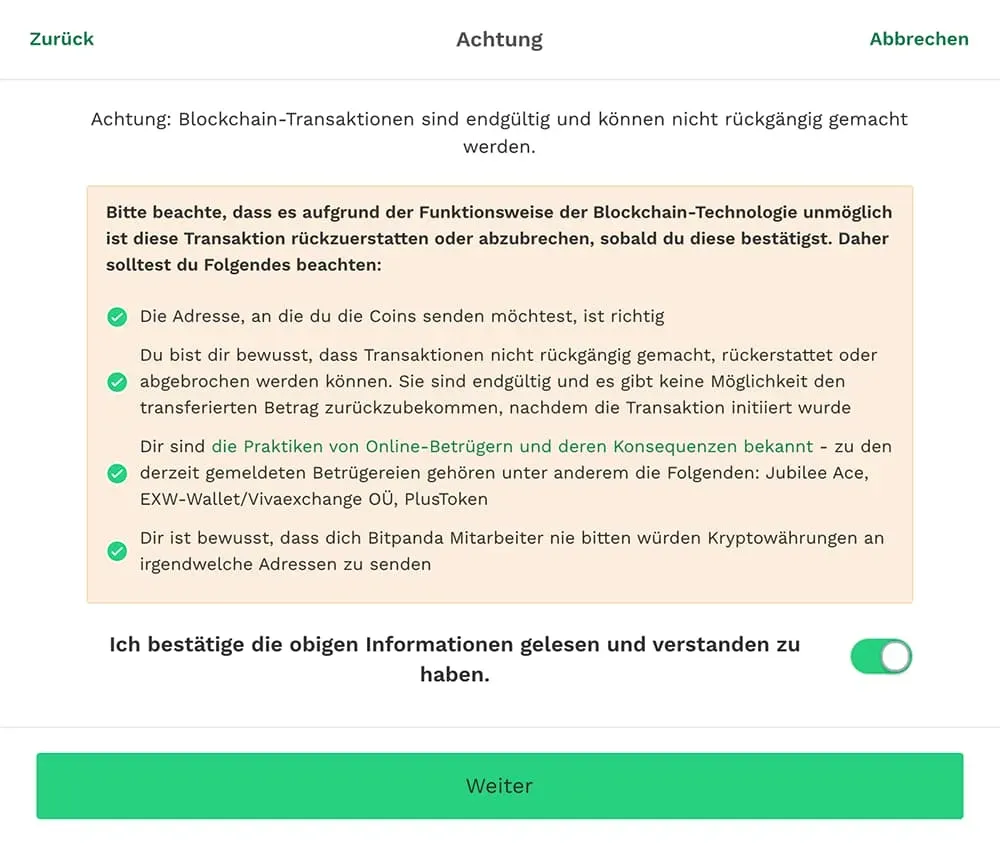
Im folgenden Schritt wird dir eine Warnung angezeigt. Lies dir alles genau durch und bestätige mit Weiter.
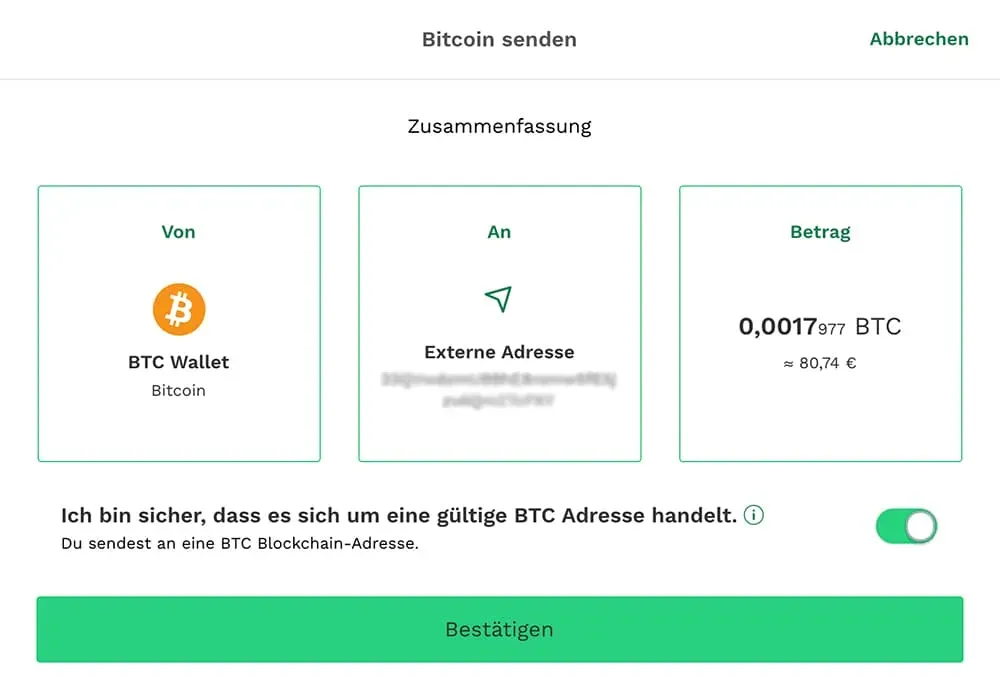
Es wird nun die Zusammenfassung deiner Transaktion angezeigt. Wenn alles in Ordnung ist, klicke auf Bestätigen.
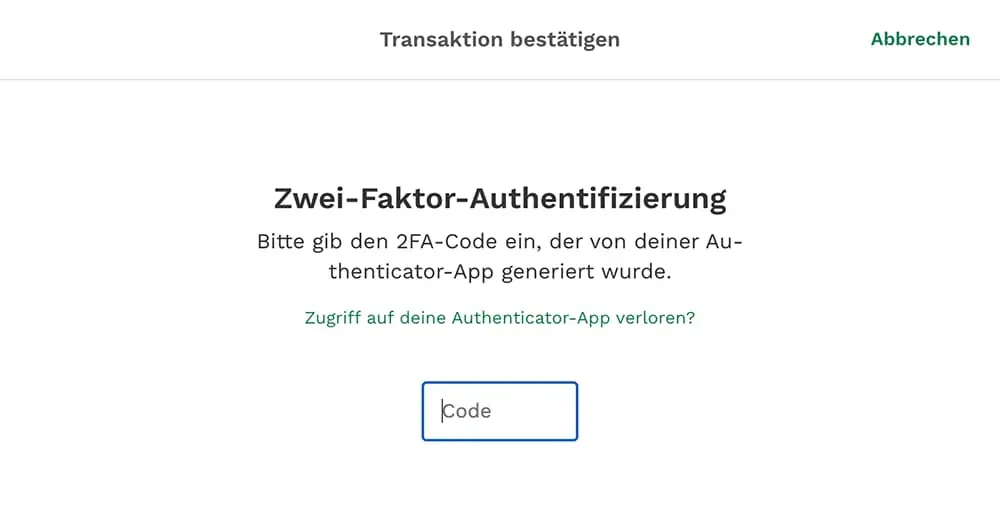
Falls eingerichtet, musst du nun deinen 2FA-Code eingeben. Sobald der richtige Code eingesetzt ist, wird die Transaktion automatisch fortgesetzt (es gibt keinen weiteren Button).
Zur Bestätigung erhältst du eine E-Mail an deine Kontaktadresse.
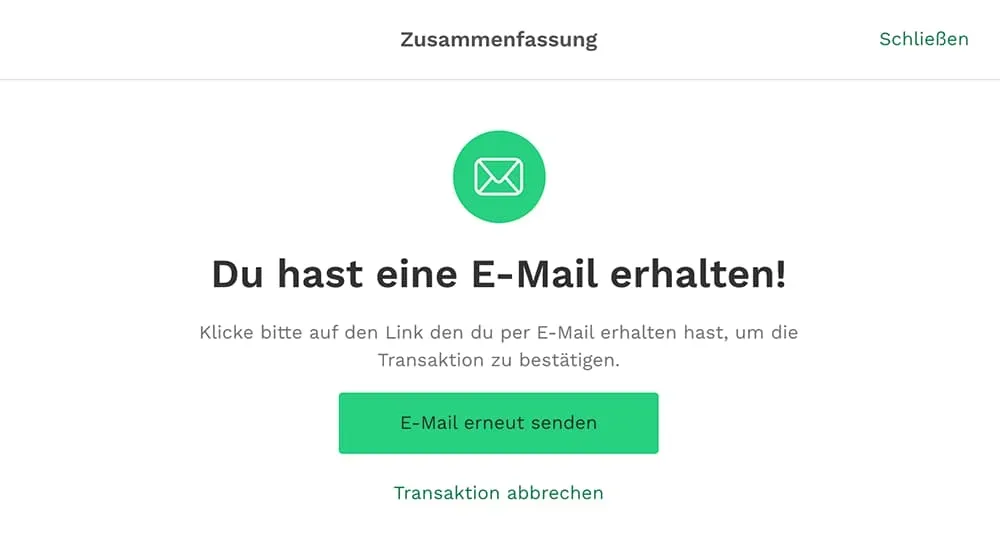
Falls diese nicht angekommen sein sollte, sieh einfach in deinem SPAM-Ordner nach.
Sobald du die E-mail erhalten hast, klicke auf Transaktion bestätigen.
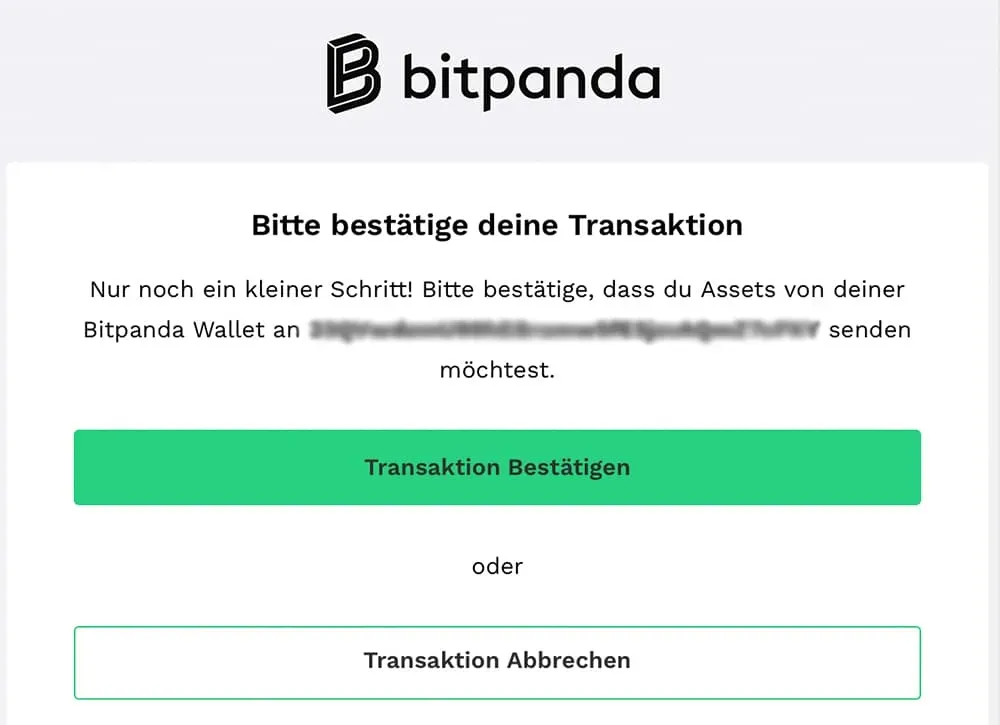
Ein neuer Browser-Tab wird geöffnet und eine Bestätigungsmeldung erscheint.
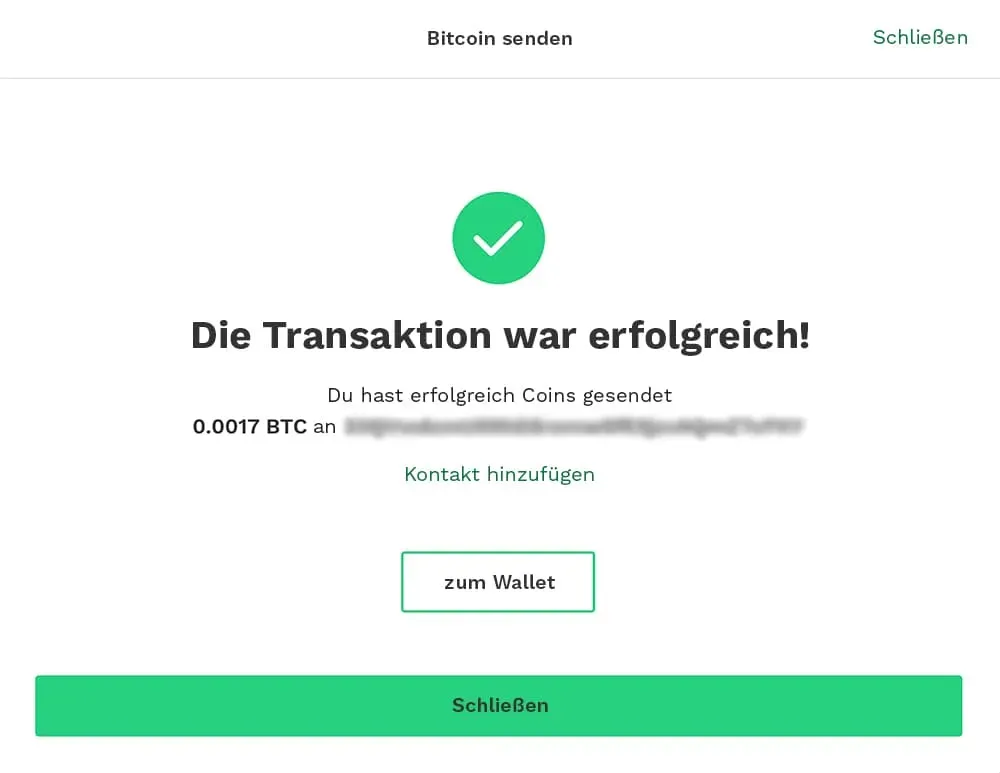
In deinem Bitpanda Bitcoin Wallet kannst du nun der Verlauf der Transaktion sehen (hier z.B. in Bearbeitung).
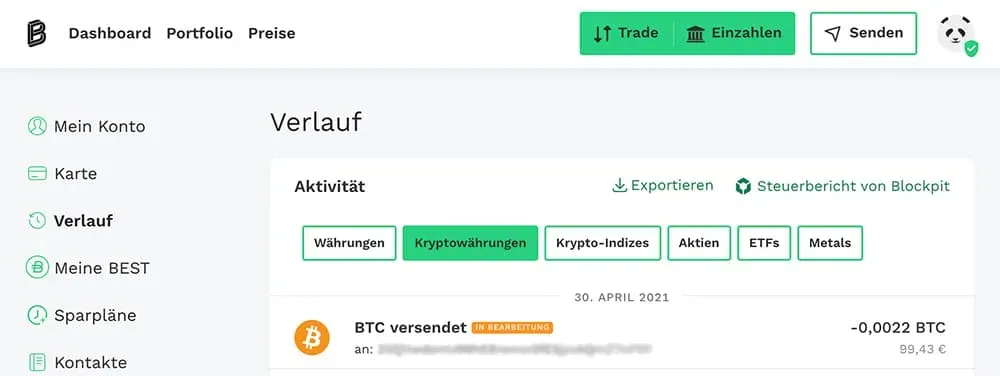
Je nach Auslastung des Netzwerks kann es nun einige Zeit dauern, bis die Transaktion abgeschlossen ist (das kann durchaus auch länger dauern).
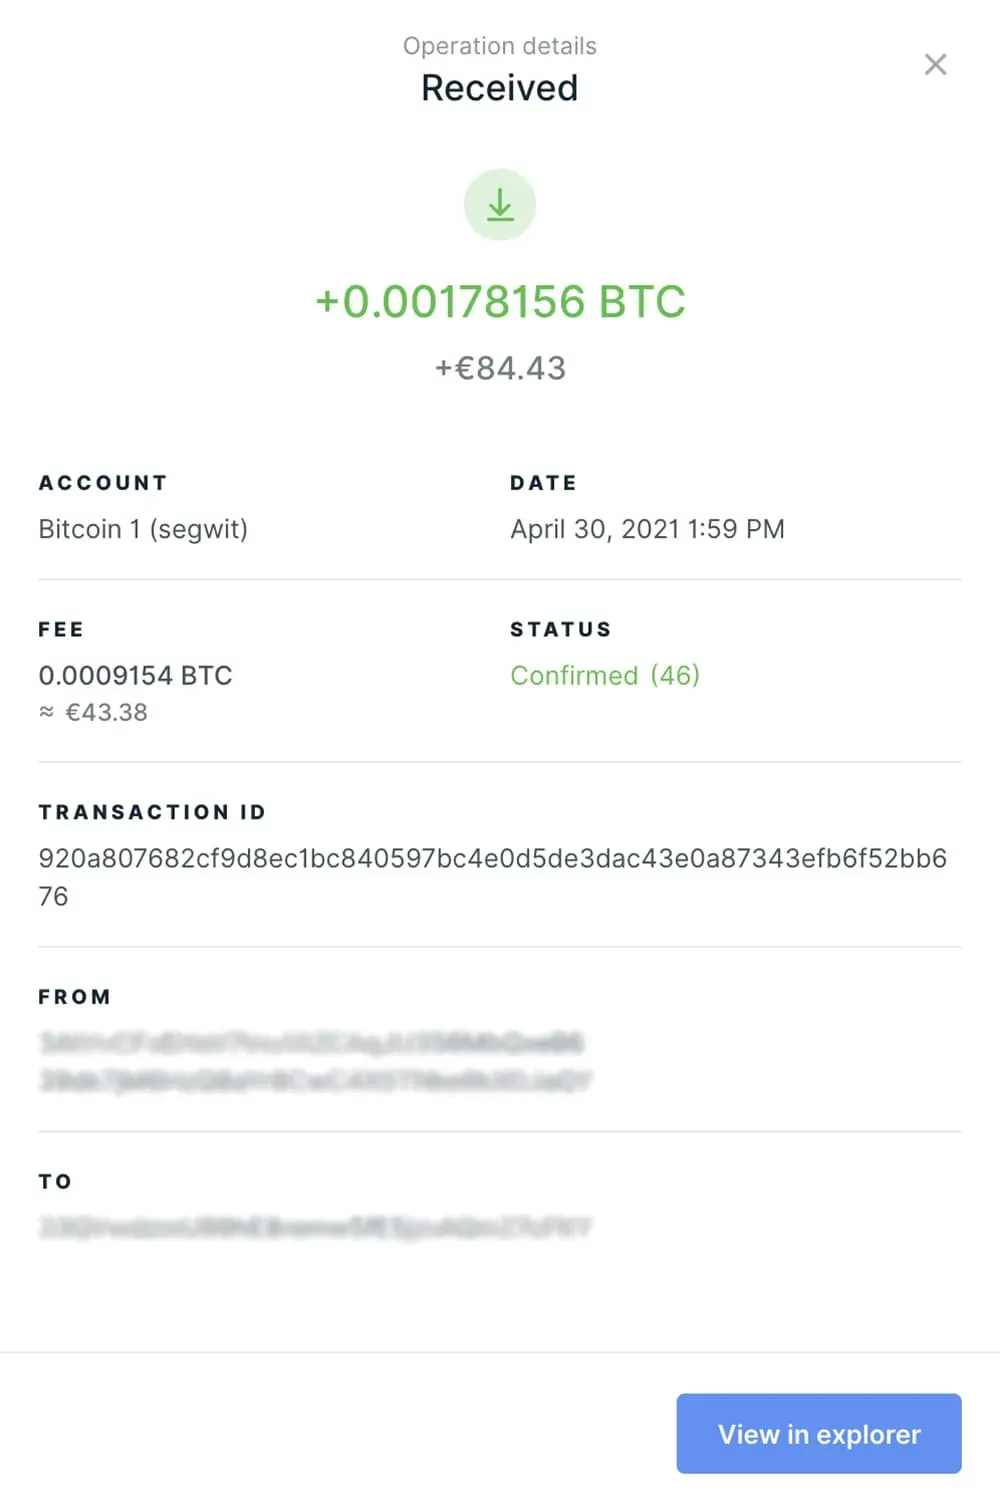
Nachdem die Transaktion abgeschlossen ist (auch das siehst du im Verlauf), wechsle zurück zu Ledger Live und klicke dort auf Synchronisiert oben rechts. Wenn die Transaktion abgeschlossen ist, kannst du die empfangenen Bitcoins in deinem Bitcoin Wallet oder unter Letzte Aktionen sehen.
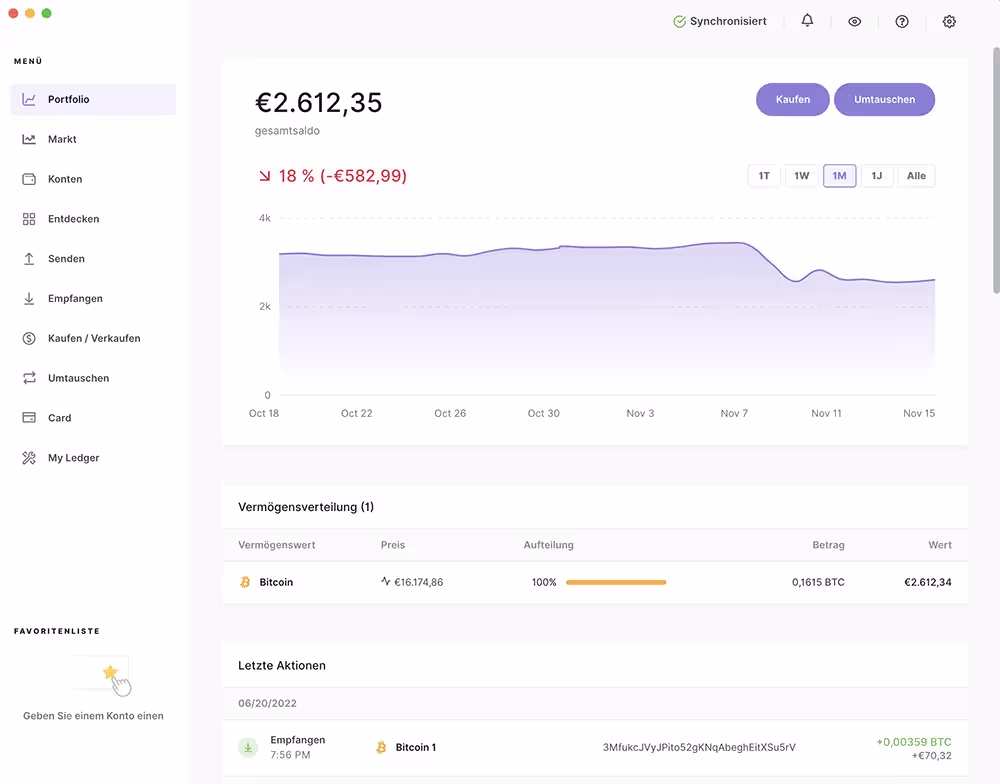
Um weitere Informationen zu deiner Transaktion zu erhalten, klicke auf den obersten Eintrag unter Letzte Aktionen. Dort werden alle Details dazu angezeigt.
GRATULIERE! Du hast nun deine Bitcoin-Informationen sicher auf deinem LEDGER NANO S Plus gespeichert!
